
Take pride in your eBook formatting (Part IX)
This is the ninth installment of a series of articles. To read the previous one, please click here
Okay, it is time for me to finally make good on my promise and turn your book’s HTML source file into a proper eBook. All we need is a little software called Calibre that you can download here.
I want to take a brief moment to point out that Calibre is a free software package and I cannot thank its developer Kovid Goyal enough for putting so much time and effort into this program. Not only is he putting all the effort into writing the application and improving it constantly, Kovid is also very active in his support forums and tries to help everyone with problems whenever he can. So, please feel free to support his restless efforts by perhaps donating a few dollars for the cause. You will find a button on his website and maybe you’d even be willing to commit a small amount every time you actually prepare a new book for publication using his software.
All right, now it’s time to get serious. One of the great things about Calibre is that it allows us to build a variety of eBook formats from the one source file we have so carefully crafted.
 The first thing we need to do is to add our new book to the Library. Simply click on the “Add books” button in the upper left corner and select your book’s HTML file. A lot of people do not know that you can actually use an HTML file as a book source in Calibre, but as I pointed out, not only is it possible, it is, in fact, the most reliable way to create a predictable output.
Once you have done that you will see the book appear in the top line of the Library listing. It may have a strange name at this point – Calibre uses the HTML file name by default – but we will fix that in a second.
The next step is to edit all of our book’s meta data. Highlight your book in the Library listing and then click on the “Edit metadata” button in the toolbar at the top. You will now see an input form that allows you to insert all the relevant information about your book on the left side. Most of these fields should be self explanatory, though the “Author Sort” line might be confusing. It is used to allow you to use your last name for sorting. So, instead of “Guido Henkel” I would enter “Henkel, Guido” here.
The large “Comments” field at the bottom is used for your product description. Simply enter your whole flap copy here, your synopsis or whatever you want to call your product description.
Moving on to the right side of the input window you will see a block that is called “Available formats.” Currently it includes only a ZIP file, which is a zipped-up version of our HTML source. Do not do anything else in this block. We will get to it at a later stage.
Finally, lets include the cover of the book into the meta data. This is the cover that will be included in the front of your eBook. It is not the cover that is used by distribution channels to list your book! It is the actual cover image inside the final eBook.
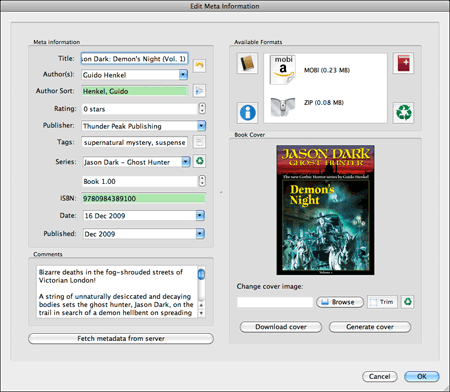
Select “Browse,” find your cover and make sure it displays properly in the meta data window. We now have all our meta data and it is time to click “OK” to make sure they are saved.
 Next, click on the “Convert books” button in the toolbar at the top of the screen. This is where the rubber meets the road – from a technical standpoint. Here you find the modules that actually turn our source HTML file into the various eBook formats. While all the menu entries and names might seem extremely technical to you, I will guide you through here to make things easier to understand, especially since most of the technical parameters are identical regardless of the selected output format. Which reminds me… let’s select an output format.
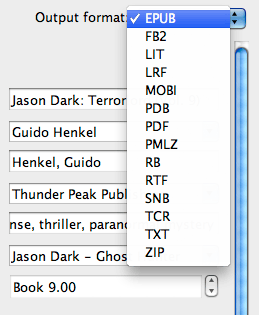
In the upper right hand corner you will find a drop-down menu allowing you to select the output format you want to build. For our purposes right now, select EPUB, which we will be able to use for the Nook, the Apple store, Kobo, Google Books and other outlets.
On the left side of the input window you will see a column of icons. these icons give us access to the different settings for the ePub compiler. Most of these parameters we will leave untouched as the default settings that Calibre provides are real world common sense settings. In fact, we could already press the “OK” button at the bottom of the window and get a decent eBook out of it.
Perfectionists that we are, however, we want to take things a little bit further.
Click on the “Structure Detection” icon and you will see a series of cryptic-looking XPath instructions. Not to worry…
Calibre uses this section to determine your book’s structure so that it can format it properly. For example, this can be used to create page breaks before a new chapter. In fact, it is the default setting. The reason I am taking you here is because in case you do not want to include page breaks here, you will need to switch it off by selecting “None” from the “Chapter mark” drop-down menu.
Next stop, our table of contents (TOC). Select the “Table of Contents” icon so we can tell Calibre how to automatically build a fully linkable TOC and include it in our eBook.
Since we have been using a special stye in our HTML file to manicure chapter headings, we can now use this style to tell Calibre where each chapter starts.
All we have to do is enter
//h:p[re:test(@class, "chapter", "i")]
in the field for the “Level 1 TOC (XPath Expression)”. It tells Calibre to look for all instances where the style “chapter” is applied and add them to the table of contents. Calibre will automatically use the entire chapter heading text to display in the TOC, which means the entire block of text that is style with the “chapter” style. From my experience that is exactly what we want. If not, you could narrow the selection down further using XPath expressions to drill down further. If you want to learn more about XPath expressions, feel free to check here.
The last step before we build our book is found in the “EPUB Output” section. Select the icon in the left toolbar and you will find a checkbox entry that says “Preserve cover aspect ratio.” Make sure to select this as otherwise your cover will be disproportionally scaled to fill the entire display of any eBook reader. I am not sure why this is not checked by default, but so be it.
That’s it. Click on the “OK” button and you will notice that Calibre is doing some work in the background. It will tell you so with a small animation in the lower right hand corner of the Calibre window.
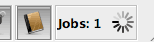 This will take a second or two, depending on your computer’s speed and the length of your book. But once it is done we are ready to save the finished eBook.
 Click on the “Save to disk” icon in the top toolbar and select a location where you want the book to be saved.
Now it is time to take a look how things turned out – it is the big moment. While it is possible in to use Calibre’s viewer, I found that despite the overall quality of Calibre, the viewer is – at the time of this writing – not at all representative for what your eBook really looks and behaves like on a real reader.
For first checks I always use the software versions of the Kindle or the Nook reader or Adobe Digital Editions. These will immediately give you the results you’re looking for, especially since many people use these application to actually read their books on. However, you should always make sure to also load you books onto the actual devices, if possible, to see they behave properly. It is always better to make sure than to make assumptions and extrapolate from a software implementation running on a desktop computer.
When I load an eBook up for the first time, there are usually three things I checked first.
- Does the cover display correctly?
- Are there proper page breaks before chapters, and do the chapter headings display properly?
- Does the book contain a complete and working table of contents?
Once you have made sure these are in order, you should begin to browse the book very carefully from beginning to end. Look particularly for passages where text switches suddenly to italic text. Particularly when have inserted the <i> tags by hand, it can happen all too easily that you accidentally forgot to close the tag properly, or you mistyped it. Only a visual inspection of the book, page by page, will make sure your text is in order, so take a few minutes and go through it.
If there are errors in your source file you will have to go back and edit the HTML file. What is important is that once you have made the changes, you will have to re-import the HTML file back into the Calibre book. In order to do this, click on the “View metadata” button again to bring up the meta data input form.
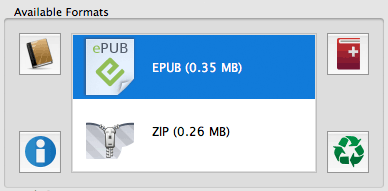
You will see that the box saying “Available formats” now also includes an EPUB entry. Delete all the entries here, MOBI, EPUB and most importantly the ZIP entry. Simply select them and hit the “Delete” key on your keyboard to get rid of them.
All we have to do now is bring the HTML file back by clicking on the icon with the red book and the plus sign in the right hand corner. Select your corrected HTML file and then go ahead and rebuild your eBook file. Save it and check to make sure the errors have gone.
Once you have confirmed that everything is as it should, it is time to build the other formats. Select MOBI from the drop-down menu in the “Covert books” form. chances are you will not have to change anything else, as the structure and TOC settings format independent, and because MOBI does not require any format specific adjustments. Build the eBook and save it.
Congratulations, you now have proper EPUB and MOBI ebook versions of your book that are virtually guaranteed to be free of the most common formatting errors found in today’s eBooks. To distribute your eBooks, all you need to do is send the .epub or .mobi file to your customers via email, or to upload them to Amazon, Barnes&Noble, or whichever outlet you want to serve. In case you were wondering, the eBook files contain all the graphics and images that are needed, so you will not have to send the JPG images with it. They are safely embedded directly in the files so that they can’t get lost.
I hope I have been able to help you with this series to understand that in order to create quality eBooks it is not only necessary to tackle the problems by their roots, but also that it is not nearly as intimidating a process as one might think.
Building an eBook from the manuscript to the final build can be done well under an hour if you’re familiar with the workflow. In fact, formatting my own “Jason Dark” titles, usually takes me no more than 15 minutes.
Let me know how this series has helped you, and let me also know there are subjects and issues that you’d like discussed in more detail. I’ll definitely see what I can do and highlight these issues in follow-up posts to this series.
In addition, if you wish to hire me to create your eBooks for you, feel free to send me an email.
Lastly, if you enjoyed this series and found it helpful, please feel free to support my efforts by purchasing one of my books. You can find them here at Amazon, Barnes&Noble or on the official Jason Dark: Ghost Hunter website.
Part I • Part II • Part III • Part IV • Part V • Part VI • Part VII • Part VIII • Part IX
 If you want to keep up with my eBook formatting work, don’t forget to subscribe to my Newsletter. That way I can keep you updated about the latest developments, updates to my books, code snippets, techniques and formatting tips.Also, don’t forget to check out my book Zen of eBook Formatting that is filled with tips, techniques and valuable information about the eBook formatting process.
Hey Guido! Read your guest post on Konrath’s blog, and enjoyed it so much I had to come check out your blog.
All I have to say is, “hell yeah!” The information you’re laying out here rocks. Thank you so much for sharing in such great detail. This is getting stashed away in my favorites.
Wish you much success!
EJW
EJ, thanks for the feedback. I’m always happy to hear when people find the information helpful and can put it to actual use.
I’m also hopping over from JK’s blog and this series is awesome! Thanks so much for making it easy to understand. I’m hopping over to check out your books because I love ghost hunting and have written a couple of short stories myself. Looks interesting! Good luck!
Thanks for the show of support. Like I mentioned in the series, if you have specific questions, feel free to let me know.
Hi Guido – as so many people have already said, this information is gold dust. For the more time-scarce of us (i.e me) do you still take commissions to render a book into html?
Thanks
Don
Saw your guest post on Konrath’s blog, and he specifically mentioned these posts. Since I’m finishing up my first novel and getting ready to format it, I’m ecstatic to have this information to base that formatting on.
Thank you so much!
Jason
P.S. I also picked up The Heretic based on your review, and am enjoying it immensely, so thanks for that, too!
Hi Guido,
Thanks for the info! Will head out and pick up one of your Dark books in return…
As for suggested topics, I would LOVE to hear about your process from this point forward. Who do you distribute your books with, who gets which formats, any specific recommendations for each seller, marketing, print versions, pricing, etc.
Thanks again…
–Jim
Jim,
The distribution path is an entirely different subject, of course, and it is highly dependent on the author/publisher and their needs. I might write some time about what I am doing and why I am doing it the way I do.
Guido,
So many thanks for all this information! I am working on converting a book my wife wrote many years ago, and you have saved me many hours of trial and error. I am looking at the first 2 chapters on my Kindle right now!
I hadn’t put together how easy the formats being based on HTML made it. I have tons of experience with it, so now this suddenly simple.
Thanks,
Robert
Robert, I am glad this has been helpful.
I followed your instructions for formatting chapter headings, and they show up perfectly in HTML and mobi. But in B&N’s Nook preview, they’re not appearing at all–the chapter number and text are all jammed up to the top of the screen. Any input?
Thanks.
Ed, without taking a look at the actual HTML code you have, it is impossible to say what might be going on. It usually also helps if you download the Nook software reader for your computer so you can actually take a look at your eBook right in there.
Thanks for the response. It doesn’t seem to like the margin tags; every other bit of CSS is working fine. I’ll try to find an alternative.
Hi Guido,
First off, many thanks for generously sharing your expertise!
I used your instructions and copied and pasted most of your code to format my book for Kindle. It’s a simple book, no images or unusual formatting. Yet when I upload it and look at the preview, I have this one flaw: the left margin has a space between it and the edge (of the box representing the Kindle), but the right margin does not. So it looks like the text is off center. If anything, the left margin is too big, so really, if the whole thing could just get shifted to the left by a few spaces, that would be perfect. I’d be happy to send you the code if that would faciliate your giving me much needed advice on this–I can’t wait to publish and this flaw is a thorn in my side. Thanks for your help!
Sophia,
I had the same problem myself. Here’s how I fixed it:
In the first block of code in part VII of this series, there’s a parameter that reads, “padding: 0.1em”. I changed the 0.1 to 0, and it did the trick.
Hope that helps! I’m sure there’s some reason Guido has that there, but changing the padding was the only way I could get my book to display correctly on my Kindle. I’d be interested to know if there is a reason for it being there!
By the way, thanks for the series, Guido–it was extremely helpful and I’m very happy with the way my first ebook turned out.
The problem is that the Kindle is not interpreting the padding parameter correctly. Writing “padding: 0.1em;” means that a padding should be applied to ALL four sides of the page. Sadly, the Kindle adds it only to the left side and ignores the others. Hence the problem.
As you said, removing the padding altogether fixes the problem.
As a followup, I figured out what was going on with my margins: the version of Calibre I’m using doesn’t preserve them correctly, and at least in my experiments, the Nook doesn’t seem to support the “em” definition at all. It will accept “px,” though.
I guess I’ll have to buy a Nook some time. I have trouble believing that it doesn’t understand em, though. It is the very basis of HTML sizing.
Thanks, everyone. You were right. 🙂 And Guido was very helpful and got back to me about it too. Like, within an hour of my comment! Sigh. I love this community.
Guido,
I have a question. I have used your guide to get a non-fiction book with pretty complicated formatting to look great on my Kindle and nook for the PC. I used the ePub and uploaded it to Amazon without a problem (not posted yet, but I am confident).
My question is: how do I get this to Smashwords? They want a .doc file, which seems like a step backwards at this point.
Thanks for all your help!
It is indeed a step backwards. Everything about Smashwords is a step backwords.
The best way to go about it is probably to start Word and then open your source HTML file from within there. Word can interpret HTML files – it may require setting an import toggle – and the result may be fairly close to what you formatted. Once it is imported properly you should be able to save it as a DOC file.
I’ve never done this because I do not use Word and I also do not do Smashwords because I am completely dissatisfied with the quality of their output – apart from the fact that they generate zero sales and are thus a waste of time – but it should work in theory.
Thank’s Guido. I had to tweak my HTML, but I finally got Word to open it.
I just looked at the Smashwords style guide, and I just want to scream now. I had perfect HTML with CSS and I have to reformat the whole thing again!? I have epub done, and I have to reformat it again!?
Yikes. That’s just too much (for now at least).
That’s why I keep telling people, forget about Smashwords. They are forcing you to a low quality output.
Guido, thanks for putting this all together and sharing it. Pretty easy to follow and something I”ll be able to use again. You’re very generous.
I had one question for people, Besides finding some weird stuff in my html viewing it in kindle and nook readers that I have to go back and replace (mostly quotation marks), after I ran it through caliber, I didn’t get a TOC. The chapter class was set up OK in html, the chapter headings came thru in the book OK, but no TOC generated from calibre conversion.
Any hints?
Thanks and good luck with the new covers and those nasty ly’s.
Doug
Did you make sure to enter
//h:p[re:test(@class, “chapter”, “i”)]
in the “Level 1 TOC (XPath Expression)” the way I described above? That should generate the TOC based on your chapter headings.
I did, I even just copied what you have here to make sure, still no TOC. Do I need something in the html code for TOC placement? The cover image and chapters came thru OK.
Thanks
Guido, I just wanted to say thank you. I am not a technical person (I last used HTML in 1999 and failed the one and only programming class I ever took), but I used your series to produce a really beautifully formatted short story. I don’t mean to brag, but IMO it compares very well to most of the stuff professionally published in my genre.
I almost cried when I got to Smashwords and saw the 85 page style guide… which is what a writer needs to do in order to get .doc to function like your nine part guide 🙂
Thanks again!
Thank you so much for your kind words, Kathleen. I am glad it worked so well for you. As you can certainly tell I am not a fan of Smashwords at all and usually tell people to just abandon it unless there is a really good reason to go through them. since it is possible to cover the major – or what they call “premium” outlets – yourself, why even bother with Smashwords? They force you to create an inferior product.
Hi Guido,
I’m going through your guide now, it’s very helpful – I was delighted to find that after hearing all about the “dreaded” formatting, it was actually quite straight forward, especially if you have some knowledge of HTML.
I will start formatting my first story on Monday (when I get my final edits back), and I am actually look forward to it!
One quick point – for international users, Smashwords is the only way to get onto B&N, which does make it worthwhile IMHO.
Dave
That is a valid point. Kobo is also a bit selective as to who they work with, so Smashwords can be helpful there as well.
Hi Guido,
I’ve been following this guide religiously while preparing my first book for Kindle. I knew nothing about HTML, and I’ve declared your posts to be the e-book formatting LAW—although I don’t even know you. Thank you for taking the time to publish this information for us “newbs” trying to muddle our way through. I have three issues keeping me from success.
My tidy little HTML shows perfectly in browsers, but when I convert in Calibre something goes amuck. The paragraph indent and margin are not reflected.
p
{
text-indent:1.5em;
margin-bottom:0.5em;
}
Two, where do I stick the image source with the cover.jpg? Anywhere in the ?
And lastly, I’ve got an image that is centered between two paragraphs in chapter 2. It’s an inscription on a charm—read fancy fonts—that is a broken link after the conversion. (I removed the lengthy filepath for this post)
I’d sure appreciate if you could offer me any direction. Thanks.
Catherine, thank you so much for your kind words. I am glad you found the series helpful.
The location of the cover artwork is irrelevant. Since the cover is included in Calibre, you can browse anywhere on your hard drive to grab it. Calibre remembers the path and will include the image properly in the resulting eBook.
When you include images in your HTML source file, by default the same folder that your HTML file is where you should place your images. You then include them simply using only the filename of the image in the![]() tag. If you wish to have a little more structure, you can place the images in a separate directory and then reference the images as
tag. If you wish to have a little more structure, you can place the images in a separate directory and then reference the images as  for example.
As for your paragraph formatting. I would have to take a look at the HTML file to see what is going on. If you wish, feel free to send it to me via email (ghenkel (at) jasondarkseries (dot) com)
Sent!
Thank you so much Guido.
Catherine
Hello, Mr. Henkel!
Thank you so much for this guide to formatting ebooks. I’m in the process of publishing my first book and I stumbled across your site while searching for a reliable way to create professional-looking ebooks. You’ve laid everything out in a straightforward fashion that makes sense and is very easy to follow.
I have one issue preventing me from complete success.
My html displays perfectly in IE, but when I view it in firefox or use Calibre to convert the html file, all of my title, chapter, and scenebreak formatting disappears. I’m left with regular indented lines of text that are neither centered nor bolded.
I’ve scratched my head over this for the last week and I haven’t been able to figure out what I’m doing wrong.
Here’s what my code looks like:
p.headline
{
text-indent: 0em;
font-weight: bold;
margin-top: 1.5em;
}
p.chapter
{
text-indent: 0em;
font-weight: bold;
font-size: 2em;
page-break-before: always;
margin-top:5em;
margin-bottom:2em;
}
p.centered
{
text-indent: 0em;
text-align: center;
}
span.centered
{
text-indent: 0em;
text-align: center;
}
Any help you could give me regarding this would be greatly appreciated. Thanks!
Emily,
Your styles look okay. There may be something else that is going on – sometimes it is just a misplaced bracket or. If you wish, feel free to email me your full document and I’ll give it a quick look-over.
Sent! Thank you so much, Mr. Henkel. You’ve made my day. 🙂
I just wanted to take a minute to say THANK YOU for this wonderful guide. It’s very easy to follow, and I used it to create a bullet-point procedure doc to help me with future books. You’ve taken the mystery out of formatting, and my book looks great!
Thank you, India. I am so glad that it helped.
Guido,
I really don’t know what I would have done without this series. I am completely computer illiterate and was dreading having anything to do with making an ebook. But this was so absolutely helpful! In fact, I’ve told my blog followers that if they’re ever thinking to self-publish, they need to come to your blog first.
Now, that I am soooo close to being done, I do have one issue that seems to be keeping me from perfect completion. I don’t know why, but all of my punctuation is coming up as little boxes when I converted my ebook. Whenever I checked it on the internet as I was writing everything out, there were no problems, but now I can’t seem to get ellipses, parenthesis, or em-dashes. Is there any way you can help me???
It seems your punctuation marks have not been converted to named entities correctly. Take a look at it or send me the file and I’ll fix it for you.
Thank you SO MUCH for publishing this guide! The only part I found at all challenging was some of the search and replace – in particular, I’ve located the ellipse symbol and tried to replace three periods with it using search/replace in MS Word (which I assume is what you are saying I should do in your example), but Word says there are no triple periods in the doc I created (and I deliberately created them just to test this so I know they are there), hence it thinks there’s nothing to replace. Any suggestions (this is on a PC)? I also wonder if you could address special characters like umlauts, as you warn that using the numerical codes for special characters is hazardous in your example with quotation marks, but I’m not aware of non-numerical HTML-accepted code for, example, umlaut a’s and i’s? Many thanks again! I’ll definitely be purchasing at least one of your books – the least I can do for such very useful advice and all your time and trouble writing it up for us. Plus I feel sure I’ll enjoy reading it. 🙂
I am sorry to say but Word is about the dumbest software ever written because a lot of people have the same problem you describe. The best way is to do the search and replace in a different software, such as Textmate, JEdit or Notepad+++
As for the umlauts, there are named entities for those as well. ä, for example becomes ä ü becomes ü and so forth.
For a full list of named entities, check here – http://www.w3.org/TR/WD-html40-970708/sgml/entities.html
Thank you very much for the link and the text editing suggestions. 🙂
I’m looking at my finished ebook. It’s beautiful.
I’m speechless.
Thankyouthankyouthankyouthankyou.
Congratulations Heather! You made it and it was easy, after all, wasn’t it?
Guido, many thanks for your great work. I learned a lot. I followed your formatting guide almost to the letter.
In the end, Calibre and Mobipocket did a terrible job of my html. Calibre would not recognise any style at all from my stylesheet in the head. I did not try an external style sheet.
The good news was that the Amazon Kindle grinder on upload handled it superbly with almost perfect reproduction — the exact same html that Calibre (latest version) would not.
I’m guessing there is something in the style sheet that I’m missing that Kindle has accommodated that Calibre has not. In any case, I’m in good shape.
BTW, I used EditPad Pro v7 to build the text from Word (and then Dreamweaver). This new version of EditPad has a great html named entity converter that instantly converts all of Word’s rules, quotes etc.
Thanks again.
Paul,
I’m kind of curious to find out why you had these problems with Calibre. Id there a chance you could email me your HTML file?
Guido, thanks for the great resource. I hit a couple snags along the way but I’ll leave those until I’m sure they’re not user error.
For the moment I have one question that’s more curiousity. I downloaded samples of two of your books to see how the TOC gets formatted by using Calibre vs hand-formatting it for Kindle. Neither book has a TOC at all on the Kindle Viewer. Do your books really not use the method described, or is there some issue with them displaying?
Some of my books do not have TOCs, that is correct. Because my stories are not chaptered, TOCs would not make a lot of sense. However, for completeness sake I have begun to include a minimal TOC in most of them these days.
Gotcha. I checked Demon’s Night, Curse of Kali and Dr. Prometheus before giving up. If that matches your expectations, you’re all good. (Just passing it along in case there’s some issue you’re unaware of.)
I just want to say first, thank you so much for creating this fantastic blog on formatting books for Kindle and Barnes & Noble, it was incredibly helpful.
I do want the people reading this however to note that Smashwords should also be used as a portal for publishing despite what you may hear here. I use it exclusively to purchase indie books as I own a Kobo. I have yet to have any issue with any item I have purchased through them as far as quality goes. The Smashwords guide, although somewhat long, is not difficult to follow and if you do exactly what it suggests you should have no issues. Remember that Kindles and Nooks are not the only E-Readers on the market and Smashwords distributes to Apple, Sony and Scroll Motion (which supports a number of smartphones). These could someday take over the ebook market.
(Sorry, I hope I didn’t hijack your blog Guido)
Sorry, but I could not disagree more. Smashwords has absolutely no value for me. I can see foreign authors use it to get on channels that are denied to them otherwise but why so many US authors put up with the Smashword bologna, I don’t understand.
The output quality they deliver is simply crap. It doesn’t work properly on half the platforms they claim to support and it reduces your document to a bare minimum on all others.
The Style Guide works, sure, but only because it abstracts you document to the barest possible minimum. You could just as well upload a TXT file without any formatting. As soon as you do even the most trivial formatting, their Meat Grinder freaks out and either breaks your eBook or vomits up some kind of error message – which by the way has nothing to do with the real problem as a rule of thumb.
As for Apple , and the other outlets, I don’t need Smashwords for that. I am doing all my distribution directly where it counts. And for outlets like Scroll Motion? I’ve never even heard of them, so why would I care?
The other complaint I have with Smashwords is that I have yet to receive a single payment from them! I listed books on their channel for 10 months or so before I took all my books off, and have never been paid.
That is my opinion on Smashwords in a nutshell – anyone can take it for what they want – and it does not even take into consideration that Smashwords has an amateur cache to me. I honestly would not want to tell people to look up my stuff on Smashwords. It’s like saying, hey, check out my techno thriller in the kid’s aisle at Walmart. No one takes that seriously.
Thank you for this guide. I’ve stared at it for the last week. Part of my problem is a pre-Intel Mac that doesn’t support various editing/programming software; and stone-age search and replace functionality on my 2004 Word for Mac. Also, as simple as HTML sounds, it’s Greek to me. I like following directions, but I apparently need twice as many as everyone else (e.g., Place your cursor in the upper lefthand corner of your document; now type the following…). I’m probably someone who would benefit from a video tutorial, and I guess I should also read a book on HTML.
At any rate, after a lot of experimentation, I’ve been able to use some of your tips to come up with vastly improved ebooks. But, and I know you won’t like this, I used Word (and a “save as” function) and Calibre to accomplish this. First off, I was able to follow your instructions for replacing straight quotes with curly ones. I added page breaks after chapters (something I did not know about before). I also made my chapter titles bigger and in bold font. When I emailed this Word doc to my Kindle, some of the indenting was off. So I then saved the Word doc as a filtered web page; or in the case of my Mac, I saved it as a Web Page, then clicked the tab called “save only display information.” I then took this .htm file, loaded it into an older version of Calibre that works with my Mac, and followed your instructions, adding a 600×800 version of my cover. When I emailed the resulting mobi file to my Kindle, it came out looking perfect–cover, indents, bold, font, everything!
The one drawback about this method is that I don’t have a table of contents. Someday, when I acquire at least a basic understanding of HTML and some better hardware/software, I will come back to your guide and make more improvements. But for now, the new versions are so much better than the ones currently for sale, I’m inclined to run with them.
I have a couple questions about Calibre:
1. Why fill out the metadata–title, author, ISBN, etc–in the Calibre application if Amazon KDP requires you to enter that info when you publish anyway? If I fill it out in Calibre AND KDP, does it mess things up?
2. The folder that Calibre created after it built my ebook contains four files, each with a different extension (jpg, mobi, opf and zip). The only one I upload to KDP is the mobi, right, or do I upload all four?
Thanks again for your very helpful tutorial!
Mike,
I am glad to hear the tutorial has been helpful to you and that you have been able to get solid results out of it.
Think of the meta-data that go into Calibre as fallback data. While every distribution outlet will ask you to enter the data also, these are used for their online search engine, etc. The data inside the book itself will help organize books on your ebook reader, for example, and give you additional information. This information may not be displayed at this time but as technology progresses, chances are that one day the information will be used.
As for the files in the folder, yes, you only upload the .mobi file to Amazon. The other files are included more for reference and archival purposes.
Dear Guido:
First of all, thank you so much for this detailed guide. I bookmarked it and plan to come back to it for future e-book formatting. I know that e-books will become increasingly sophisticated as time goes by, as will e-readers. It is a good thing to have a stable way to ensure that formatting works. I love the possibilities, as I want to turn some of my basic e-books into visual feasts for the eyes. I appreciate what you have offered here and know it is great information for anyone who wants to format an elegant e-book.
That said, I have two quibbles with your assumptions. First of all, I can appreciate what you are offering only because I took a foundational HTML class and have been learning Adobe software in classes for the last six months. HTML is logical and I was surprised at how easy and empowering it is. But it is not realistic to say that anyone can learn this easily in 30 minutes. You discount all the years you have spent learning the basics of the computer, and learning to think with programming logic. For those of us who are not as tech savvy, even looking at the first example of HTML can be head spinning. It’s taken a step-by-step instructor-led environment for me to even begin to understand code. I know I’m a beginner, and I plan to take the next level HTML class when it is offered, as there is so much more to learn. It will take me many hours of practice and trial and error to apply this knowledge to my e-books. It will be worth it, and I will be able to do this much more quickly after learning on the first one. I will be referring to your article as I learn, but it will take me much longer to do it and not as quickly or easiy as you suggest.
Second, I have had only positive experiences with Smashwords, including increasing royalty payments. I published my first e-book in 2009 with them, and received my first royalty payment of $34.53 in July of 2010. My last quarterly royalty was for $424.66. My books are non-fiction, which has not reached the heights in sales that fiction has, but is growing. Smashwords formatting guide helped me prepare something decent for that stage of the e-book infrastructure, and also helped me format something decent for Amazon, and actually laid a foundation for my understanding of how your formatting can take me the next level. No, Smashwords does not offer the elegant level of formatting you recommend, but it means that I can get my e-books out at a level that gets me started, with the skills I already possess (word processing). Of course I’ll be improving my e-books, and I won’t just depend on Smashwords. Over 20,000 people have downloaded my free e-book from Smashwords, Apple, Barnes & Noble, Amazon, Sony, Kobo, and Diesel in the last year, and that would never have happened without Smashwords. It’s exciting to watch it all evolve.
The infrastructure is evolving, so I want to take advantage of all opportunities to publish and distribute my e-books. A company one has never heard of today might be a major player tomorrow. A primitive format in the developmental stages of an industry might still have value even as more elegant formatting evolves.
Thank you for showing me another way to improve my e-books.
Thank you for the information. You clarified issues and techniques that had stumped me and , almost, made me give up plans for epubing my work. Thanks, again.
Hi Guido,
Thank you for the wealth of information here! It’s kind of astounding in all honesty.
One thing I’m curious about is comic books. Or rather an ebook that contains mostly full page artwork but has some prose towards the end. How would that work given what you’ve written here?
Would it be a matter of using the style sheet and html like you’ve described for the prose but then having jpegs at the beginning?
At this point I’m mostly concerned with comics but in the future I’ll be trying my hand at ebooks as well so regardless this info is amazing!
Hi Guido,
Well I managed to make an ebook… somewhat. There’s a couple of small issues buggin me.
I can’t seem to get a title page to appear correctly in that it would appear as such on its own page and centered:
Title
Author
I’ve tried using h1, h2, and page break commands but it doesn’t show up correctly in the final epub document.
Other than that, not bad for a first try.
I’ve also been doing some further reading and most people suggest having mimetype, containers, and all other kind of files included with zips and such. Do you not do that for your books?
Adam,
The approach would really depend on what you would like the comic book to look like. The important thing to remember is that currently text cannot overlay images in e-books and text can also not float around images in e-books. While some readers support it with a bit of trickery at this point, it is not compatible with the majority of e-book readers.
Therefore, there only solution is really to have an images and then text underneath, like a caption.
I do not recommend usage of h1 or h2 tags, as described in my tutorial. They often have unwanted side effects that can be a little hard to manage.
To create a centered title, simply create a separate style for it, declaring font size etc along with centering. margin-top allows you to move it further down ion the page. Then put your title in the HTML part, kind of like this
<p class=”title”><span class=”centered”>THIS IS MY BOOK</span></p>
I’m not sure why anyone would recommend adding mime info etc in ZIP files. What do you do with ZIP files anyway? They probably mean the actual ePub file. Yes, that information is in there but it is automatically generated by Calibre and I do not have to worry about that at all.
Fantastic guide, Guido. Fantastic look inside the engine.
Just a quick question:
What’s your take on using line breaks in the form of and  ?
Thanks and Best,
Brad
Sorry… that’s paragraph tag –   – paragraph tag; and the br / tag.
I use <br/> occasionally to create a very controlled and tightly spaced empty line break – especially in centered paragraphs where I would have to includ ethe centering tags with every line otherwise.
I also use <p> </p> on occasion when I need some space but the occasion doesn’t warrant creating an entirely new style for it. As a rule of thumb I try to avoid them but sometimes it really is the easiest and most convenient way to create a line break.
Thanks for your response, Guido. Again, this guide has been extremely helpful. With my first book, I used someone else’s template and then gummed around with the html until it looked right (the equivalent of duct tape and chicken wire, really). I never considered that what looked right on the Kindle might show up screwy on another device. I’m now in the process of redoing the formatting on the book and creating a clean template that I can use on future projects.
Thanks and best,
Brad
Feel free to ask me if you have any questions or problems.
Hi Guido – First, thank you very much for your very helpful guide. Unlike the others, I’m struggling with the html, though, and since I haven’t tinkered with html since the late 1990s, I’m having a little trouble.
For instance, this, in the styles:
}
p.title
{
text-indent:0cm
text-align: center
font-weight: bold
font-size: 2em
margin-top: 6em
margin-bottom: 6em
page-break-before: always;
is coming up with ‘text-align’, font-weight’, etc black or green, whereas in this (pasted in, where I’d typed in the ‘title’ sequence)
p.chapter
{
text-indent: 1em;
font-weight: bold;
font-size: 1.2em;
margin-top: 2em;
margin-bottom: 1em;
page-break-before: always;
the ‘text-indent’, ‘font-weight’, etc words are blue. (I’m using a trial version of TextMate.)
I’m also having trouble getting Calibre to generate a table of contents, despite obediently pasting in
//h:p[re:test(@class, “chapter”, “i”)]
into the Level 1 TOC (XPath Expression): field in Calibre’s Convert Books dialogue, sprinkling some dried bat powder on my Mac, turning around three times and singing A Nation Once Again.
The reason the colors change are most likely because you forgot to add semicolons at the end of each line in the first example.
As for your TOC, make sure you also fill in the “Structure” settings in Calibre, as described in the tutorial. That should fix your problem.
Thanks, Guido. In the ‘Structure’ settings, I’ve filled in
//*[((name()=’h1′ or name()=’h2′) and re:test(., ‘chapter|book|section|part|prologue|epilogue\s+’, ‘i’)) or @class = ‘chapter’]
in the ‘Detect chapters at (XPath expression):’ field, and this dialogue already has
//*[name()=’h1′ or name()=’h2′]
in the ‘Insert page breaks before (XPath expression):’ field. This doesn’t help.
In the “Structure” enter //h:p[re:test(@class, “chapter”, “i”)] and set the “Chapter marks” entry to “none”
Combined with the “Table of Contents” setting of //h:p[re:test(@class, “chapter”, “i”)] that does the trick for me.
It does – thanks, Guido.
Guido, I’m having a strange little problem today that didn’t happen yesterday. I searched-and-replaced for all the apostrophes in Word, making sure that they were correctly curly.
But today TextMate refuses to recognise them when I try to search-and-replace ‘ for ‘
(Incidentally, how do I tell TextMate which are left-hand quotes and which right-hand quotes?)
Guido – I solved the search-and-replace problem: you have to paste in the search item into the ‘Find’ field, rather than typing it in, in TextMate.
But meanwhile, the contents list is still proving distinctly buggy. Today I started practising on a new file. I couldn’t get the contents list to show, most of the time (though it was accessible through the Go menu), but some of the time it would turn up at the end of the book, or one item on the list would turn up.
I can (I think) get the contents list to show by checking the item ‘Put generated Table of Contents at start of book instead of end’ in the MOBI Output section of the Convert Books dialogue, but this puts the table of contents after the cover but before the title page, which looks a little strange.
I never put the table of contents in the front of the book. It is archaic, a relic of print books where people would use the front of the book to quickly go and find where they want to get to. You don’t do this in e-books any more. Instead you use the navigational menus. And since no one “reads” a table of contents, it only makes sense to put it in the back of the book here it is out of the way and does not interfere with free reading samples, which are usually culled from the front of the book.
Good sense. Whatever, I now seem to have two sets of contents, at the beginning and at the end, but while my title, author name and chapter headings look grand on testing the file as a webpage, when I make a .mobi the title, author name and chapter headings are the same size as the rest of the text.
Oh, and there are great yawning gaps between the paragraphs. I wish I could take the .mobi of something like The Hunger Games, which is beautifully formatted, and see how the html was set up.
The text size problems stem from issues in the software Kindle reader. It looks differently on the actual device.
As for the spacing that is controlled through your paragraph styling, just as I describe in the tutorial.
You mean this?
[CODE]
p
{
text-indent: 1.5em;
margin-bottom: 0.2em;
}
[/CODE]
That’s in there. I can’t see any difference, having gone over the code line by line, between one that works and one that doesn’t.
I would have to look at your full code to determine why you have the spacing issue. If you wish, I can format the e-book for you. Here is a link where you can find some pricing information for my services – http://guidohenkel.com/ebook-services/
A very kind offer.
First let me say thls is awesome, you have saved us a lot of headaches and time, thank you.
Only issue we had was with iBook on Apple. Seems cant use the tags in Calibre metadata and the TOC had to be built in Sigil with H headings.
When we went from Calibre epub to ibook we had the following error message
ERRORITMS-9000 “Unmanifested file found:9780983186823 .epub/META-INF/calibre_bookmark.txt” at Book
ERRORITMS9000:”DemiseoftheSoccerMoms_iBook_0804011_split_029.html(19):
unkonwn element “ii” from namespace “http:/www/w3/org/1999/xhtml”” at Book
But by leaving out tags and TOC from Calibre and building TOC in Sigil book loaded fine
Without seeing the actual code that is being generated it is hard to say what is going wrong there. It looks, however, as if a tag had been accidentally misspelled, as “” is not a valid HTML tag.
It is most definitely not the meta tags in Calibre. I am using them in every single book I format without any problems. The problem is more likely Sigil, creating an incompatible output file, but again, without seeing the actual file it is really all just guess-work.
Interesting. I would agree except our first attempt was without Sigil and that is where error message occurred. Could it be because we were updating a book already on ibook and error was on their part. Not a big deal but at least if happens again I know how to correct it
Your series is greatly appreciated. I had beaten my head against the “conversion wall” until I was about to give up. Many thanks.
Very helpful guide, Guido! Thanks so much for this.
I need to center some full page illustrations in my ebook – at the begining of each chapter. How would that code look like?
I saw that there are several Kindle books out, that are practically scanned versions of old, illustrated books – antique children’s books for example. It includes the possibility of zooming in and looking at detail – which I was told was only actually possible with iBooks. I am glad the person, who told me that, was wrong on this point. But how would I actually program this? And is there anything I need to be careful about when it comes to the zoom-in/zoom-out?
Thanks in advance, Guido!
Centering images is explained in the tutorial somewhere in conjunction with the little pinstripe vignettes.
As for images that can be zoomed, to the best of my knowledge that is not possible on the Kindle – at least not in the mobi or ePub format. Even on the iPad it cannot be done using a regular ePub file format. Can you name a book that has this feature? I am pretty sure these will be programmed apps and not ebooks per se.
Hi Guido,
yes, I saw the info on how to center images in the tutorial. I was just not sure if full page illustrations are handled the same, or what size one would take for it, considering the zooming.
I bought a book in the German Kindle Store that is called “Der Struwwelpeter, oder lustige Geschichten und drollige Bilder” for 99cents. It is based on an old book that I know from childhood – the pages seem to be scanned it. And I can zoom right into the images.
Point is only, that I use an iPad with an Kindle app. I do not own a Kindle myself, so I cannot check how things look there. Unfortunately.
If you wanted to include a full page image into your ebook – as huge as possible – what size would you take?
I really hope this is not a totally stupid question with an obvious answer, but I am kinda stuck on it. It would be totally nice if you could help me out here.
Thanks.
I’ll grab that book and take a look. I wonder if it’s actually the Wilhelm Busch version of the book. I’ll have to check it out.
Anyway, if you want the best results, make the images 600×870 pixels. That is the full displayable area on a Kindle and also looks good on an iPad.
To be more precise: I need to center not only full page illustrations, also some text (just single sentences). But not only horizontally, but also vertically.
As if having a Chapter Title standing all alone in the middle of an otherwise empty page. (using pagebreak)
Is that possible?
No, that is not possible. I wish…
cross posting.
Thanks for the size. Wow … that is awfully small!!!
I am pretty sure the images in the book I have are larger. It even carries a note that it is “optimized for larger screens”.
I can give you the link for the book, if you want. There is another version out, for 9,99. I bought the 99cent version specifically to check out how they did the images … It had a look inside option, that the expensive one did not have.
Sorry to bother you with this. Curious what you will find out.
“No, that is not possible. I wish…”
ohhh … 🙁
Then I would need to work around with another centered image … An image with white space on top or a large margin. Dang.
Including white space in the image won’t help you – you could do that with a CSS style easily.
The problem is that every display is different and you will not know how much space to include. A Kindle device has a different screen than a Kindle reader on the iPad, which has a different screen size than a Kindle reader on an iPhone, which has a different screen size than Kindle software on a PC where users can adjust the window to any size they wish.
That is the reason why it is not possible to vertically align content. The environment is simply too unpredictable and HTML/CSS has no support for it.
As for larger images, you can make them larger, of course, it is your call, but keep in mind that large images create larger e-book files, which will take longer to download. In addition, Amazon will charge you for that download filesize of you book is priced above $2.99
I got the book and I’m running it in the Kindle reader here but I see nothing about zoomable-images. What exactly are you referring to and how do you zoom those images?
Yes, I understood I cannot center vertically. I just wanted to make sure that the objekt is not glued to the top page, thus the (stupid idea) with the larger image – obviously there are better ways of doing this …
Normally I would not bother about this, but just with this one book it matters a bit.
Filesize … additional costs … hmmm … Thanks for the info. Will check.
By the way, here is a link to the book I mentioned:
http://amzn.to/nLpBX6
Maybe you can get it in the US Kindle store too.
Thanks again for your time. Much appreciated.
Cross posting again.
You are running the book on a Kindle? Maybe you cannot see it there.
I could send you an email with pictures of my iPad screen if you want … Not sure how else to help.
Hmmm … I made screenshots of the 100% display on my mac screens with Kindle app. Images are smaller than I thought. No zooming possible there, either. Looks unprofessional with the different sized images next to each other, but … ok.
I checked on some sizes:
662×827
610X851
636X851
well, you SEE in the layout that the images of the scanned pages have different sizes, but looks terrible. I assume the 9,99 book is better layouted.
I can only zoom right in on the iPad, not on my normal screen. So that is probably why the images appear to be bigger. They are not much larger in size than the number you mentioned above.
Getting one of your books now to reimburse you for your investment (smile).
The zooming seems to be an iPad reader feature and is not part of the actual ebook. Whenever the iPad has to scale down an image to display it, because the original file was larger than the display allows, it would probably let you zoom in so you can see the original size image.
As I said, that is not an e-book feature. It’s a feature of the iPad software.
The iPad software allows serious zooming. See here:
http://dark.lassal.de/hidden/zoom/
not pretty – jpg artifacts all over the place. But you can do it – that is why I got confused in the first place.
Too bad it is not part of the actual ebook.
Hi Guido. Sorry to bother you again (though I rather suspected I might need to be in touch again at this point!). I have completed the formatting of my partner’s epic poem (the search-&-replace process you suggested (to include span tags) worked a treat).
I’m now trying to work out how to add more than a single file to Calibre, for conversion. You’ve said in a previous post that your trial use of a separate CSS file was successful, but I can’t find instructions for adding more than a single “your new book” file (apart from the cover, of course). What’s more, Alex’s book consists of a central narrative poem, and 30-odd additional poems which – at the moment at least – are separate files, linked at relevant points by a href tags. (A quick look at the excerpt on his website might explain this more clearly than I can.)
So, there are those 30-odd files, plus a stylesheet, to incorporate into the bundle. Can you tell me – is this going to be possible? and if it is, could you indicate how I should go about it?
Many, many thanks if you can help.
Jane
You will have to put them all in one file – something you should have done from the beginning, probably, because it would have made your processing a lot easier and smoother.
Thanks, Guido. I really appreciate your responding so quickly.
So, just to confirm, the CSS will need to go into the head section?
And I’ll need to include all the linked poems at the end, where they will look as if they are just added as further pages after the main narrative?
Hopefully I can still use links within the narrative so the reader can hop to the relevant poem and then get back to where they were?
The CSS portion goes into the HEAD section, yes.
As for the poems, I am sorry, but I am not following what you are saying. What are linked poems? Are you referring to a Table of Contents? If that is the case you might find this blog post that I wrote earlier this week interesting.
http://guidohenkel.com/2011/08/the-table-of-contents-in-the-digital-age/
In essence, all your source goes into one file. First the HEAD section, then the BODY section containing all your text. With the exception of images, you do not want to have any additional external files.
Once you do that, Calibre can automatically build a table of contents for you so you do not have to worry about linking the poems. Calibre can do all that work for you.
Oh dear, sorry, Guido. I fear this is becoming boring for you and for anyone else who might be tuning in here. I really don’t want to monopolise things.
Thanks for the link to your recent blog post – I had read it, and Alex and I had decided that his poem doesn’t need a TOC. To try to clarify: he has written an epic-length thriller poem (no chapter breaks), and at intervals there is a link away to other (short) poems which, for example, elaborate on the character currently being introduced. The reader is then taken back to the point they left in the main narrative. This works fine on the extract which appears on his website, and he has written the book on the assumption that ebooks are able to replicate the effect.
So I’m here on the technical side, trying to make it happen. Whether it will work in practice remains to be seen. I have all fingers and toes tightly crossed!
I’m going away now to leave you in peace, and work on putting everything into a single file. I may be some time, as someone once famously said…
You can easily link away from the main text into a poem and then link back. Yes, that is possible, but perhaps the more pertinent question is, should it? I would spend some time to very seriously think about if this linking was born out of necessity on the website or if that is truly how you guys want the narrative to flow – with links – or if it would not be better to actually embed the poems in the text.
Guido,
First of all, thank you for saving my sanity. Even with your step by step guide, this was not an easy process for me. Without this guide, I believe it would have been impossible.
My TOC still doesn’t show up in the actual doc, you have to click the ebook menu for it. But I think I’m okay with that. My main question is, how do I include clickable links within my book? Links to my blog, other ebooks I have for sale, etc.?
Sorry if this has already been addressed. I tried to go through all the comments, but I might have missed it.
Thanks again!
Sarah Elisabeth
Links are create using anchor tags. The code below, for example, will link to the front page of my blog.
<a href=”http://www.guidohenkel.com”>http://www.guidohenkel.com </a>
The href part of the tag is the actual URL and the text between the <a> and </a> tags is the clickable text that will be printed on the page.
What a great tutorial! Thank you very, very much.
I picked up one of your books as thanks!
Hi, Guido, I have another question. I put the following in for a title and byline on a title page:
p.title
{
font-weight: bold;
font-size: 5em;
page-break-before: always;
margin-top:5em;
margin-bottom:2em;
}
p.by
{
font-weight: bold;
font-size: 1.5em;
}
and then in the body I have:
<p class=”title”><span class=”centered”>Title</span></p>
<p class=”by”><p class=”centered”><span class=”centered”>By me</span></p>
When I pull the finished book up in Nook, the title and byline are nicely placed, etc., but they look just like Chapter heads, both the same size, no matter what numbers I put in. What am I doing wrong?
Thanks again — Alisa
Try this
<p class=”title”><span class=”centered”>Title</span></p>
<p class=”by centered”><span class=”centered”>By me</span></p>
Hmm, that didn’t help the size issue. I wanted the title to be much bigger than all the other type. I wonder if it would present properly in the actual Nook (I’m using the Nook for PC download)?
Even if it doesn’t work, this has been invaluable — thanks so much! I’ll definitely download one of your books to thank you!
Alisa
The Nook software reader is broken from end to end. Most of the time it crashes and in many cases it doesn’t render eBooks even remotely right.
If you want to take a look at ePubs, get a copy of Adobe Digital Editions , which can be downloaded free from Adobe’s website – http://www.adobe.com/products/digitaleditions/
It is probably the most stable and reliable ePub reader. All other software readers I’ve tried (Nook, Kobo, Stanza, Calibre) were sadly broken in one way or another.
Do you have any idea why the toc in mobi would list all of my chapters as “unnamed”?
Thanks — Alisa
I followed all this diligently but all my ‘ and , turned into ? What went wrong?
Sounds like your special characters have either not been converted into named entities or that they have been messed up while copying from one app into another one. At which step in the process did they turn from quotes into question marks?
Thanks for replying. I really appreciate this and this guide. The ? happened when I turned it into and epub, but on reflection, I realised that I hadn’t changed them into named enties because I didn’t quite understand how to do it. I was using notepad and it didn’t have the function you mentioned. Do I find and replace all the ” with the corresponding names you gave?
Yes, exactly. In part six of this tutorial I have the most common ones listed.
I tried it and they came out as written eg The Drorgon Slayers Choice. I tried it without the and the same thing happened. Help!
Ok, so the &rsquo disappeared from my last comment when it posted, I guess koz I had it in greater and less than signs. Slayer&rsquos choice is how it’s coming out for me.
I worked it out. I left off the ; at the end of the code. I didn’t realise it was part of it. It’s been fun, though I have a headache. Now I just have to work out how to make that nice heading go into the centre.
Feel free to send me the file via email. I’ll be happy to take a look.
Thanks for all this Guido, now my book looks better than a lot of the ones I buy.
You have no idea how happy that makes me. 🙂 Thank you so much.
Hi guys,
Are there any alternatives to Microsoft Word. Word is a horrible piece of software in my opinion. Talk about over complicating and having a mind of its own.
Any takers?
Thanks
Ian
It depends on your platform. I’m on a Mac and Apple’s Pages is the perfect word processor for me.
However, if you’re a writer ,you may also consider something like Scrivener. It is not a word processor per se but a specialist software for writer -http://www.literatureandlatte.com/scrivener.php
I’ve written all of my books in Scrivener and for me it is the best and most well-rounded writing software on the market.
Wow… I clicked over from ywriter at the suggestion of the creator. I’m nowhere near ready to publish, but I read through every page and I really like what you have to say. I will definitely be bookmarking and returning when the time comes to finish my book. Thanks for all the help!
A huge thank you from me!
After being pointed here by David Gaughran’s ‘Let’s Get Digital’ publication, I used the whole series of guides to put my illustrated book on to the Kindle. A few hiccups along the way as it was all new to me, like, after dowloading a text editor I needed to update my version of java and also download some plugins (e.g. XML etc…). Also I had to tell Calibre what code to expect (i.e. Cp1252) by going to Preferences, Advanced, Plugins, File by Type Plugins, HTML to ZIP.
To be honest, without this guide I would have been completely lost. Another huge thank you from me.
Simon
Thanks for an excellent series of articles. I am reasonably competent at HTML, so with your guidance I was able to sort out all the small problems that I had. In particular, replacing the italics with tags gave me some problems, because I had several consecutive paragraphs in italics, and the system didn’t like that. But it’s sorted.
The only problem I have is that having put everything into Calibre, it is not showing chapter headings correctly. I am confident that the HTML is correct (I used both p styles and span styles) and it works fine in Mobi. So I don’t want to change the HTML if that will damage the Mobi version. Should I have two versions of HTML – only for epub with just the span class, and one for Mobi with the p class?
Thanks for your help.
Rachel
One version should cover both formats. That’s how I work a lot, so there are no real compatibility issues. If you have your HTML tagged with p and span tags, you should be fine across both platforms.
The problem may just be the Calibre viewer. I’ve never really used it because when I started using Calibre the viewer was not working properly. To preview ePub versions I always use Adobe’s Digital Editions (http://www.adobe.com/products/digitaleditions/) which is available for free and seems to be the most reliable ePub viewer I have been able to find.
Hi – thanks for the prompt response. I did that, and it doesn’t work (but it’s fine in Kindle!). Maybe I’ll just do it again and see if it works better. But in the Adobe Digital Editions it won’t link to chapters (but will page through) and the heading style for the Chapters isn’t right – but all fine in Kindle (which I did after the epub version. How odd!)
Thanks for your help, though – much appreciated. If you have any brainwaves, please let me know.
Rachel
Rachel, feel free to email me your HTML file and I’ll be happy to take a quick look at it.
It’s really kind of you to offer – but I thought I should try again before giving up and potentially wasting your time. I solved it by first separating the pages in Sigil. I had tried this previously, but couldn’t find how to preserve the cover aspect ratio which looked awful in Adobe. In the end, I put the HTML into Sigil (without the cover page) and then put this into Calibre, where I added the cover page.
I have one remaining issue. I can’t get it to show my Title page or my Copyright page (or Acknowledgement page) in the table of contents. They have H3 headings (which I have checked are included in the XPath expression) – but they just don’t show. I added semantics to start with (in Sigil – I don’t think you can do that in Calibre?) and thought that was the problem. But I’ve removed the semantics, reproduced the TOC (which is fine in Sigil) but still no joy.
Any suggestions? You really are being amazingly helpful!
Rachel
The Sigil steps seems horribly extraneous. It should not be necessary. If you format your HTML correctly, Calibre will be the only software you will need to do everything you are trying to do.
It is unfortunately impossible for me to determine what might be the problem without taking a look at the HTML file.
However, the cover does not go into the HTML file, actually. It is part of the meta-data. It also doesn’t need a TOC entry, because all software and devices I’ve seen have a “jump to the Beginning” kind of navigational menu entry that takes you there.
I am not sure why you would want the copyright page to be included in the TOC, but that is a matter of taste, naturally. Nonetheless, it should not be a problem at all.
Sorry I can’t be more helpful from afar.
What a great series! Thanks to you, I’ve taken the plunge and began finishing a few book ideas.
I was able to get an experimental book formatted and displayed on my Kindle One and my Nook 1st Edition. The Kindle shows the table of contents, but the Nook doesn’t. I made sure that //h:p[re:test(@class, “chapter”, “i”)] was in Level 1 setting for both MOBI and EPUB conversion in Calibre (version 0.8.26). Am I missing something else?
Thanks again for this great series on formatting!
Hard to say. I would double-check the ePub file in something like Adobe Digital Editions to see if the TOC shows up there.
The TOC showed up on the left side bar, but not in the document itself. Is this correct? Perhaps I’m confusing the TOC display with the way Kindle shows it as part of the document.
As a side question, how does copyrighting work when submitting a book to Amazon, or Barnes and Noble? Are there procedures that you take to copyright your books before releasing them to the public for purchase?
Ron, that is exactly how it should be. In the digital age we no longer have TOCs in the front of the book as part of the content, they way it was in the print age. These days, TOCs are part of the meta-data, that are accessed through the software’s menus.
I wrote a piece about this a while ago but you can still find it here – http://guidohenkel.com/2011/08/the-table-of-contents-in-the-digital-age/
As for copyright, no you do not have to do anything. Your work is automatically copyrighted the moment you type the words in your computer. You can register your copyrights officially with the government (http://www.copyright.gov/help/faq/faq-register.html) but that will only do you good if you truly intend to legally defend your rights and sure for damages sometime in the future.
Regardless, however, you can register this at any time, even after you already published your works.
Guido – you have been amazingly helpful. I do know that in theory it shouldn’t be necessary to go via Sigil – but it has no problems with the HTML, and nor did the Mobi version. It was only the chapter headings, but I’ve sorted it all out now, and the Kindle version is launched! Thank you so much for your help.
The only remaining puzzle is that having done all this wonderful work, I then started to look in detail at Smashwords so that I could upload to different formats – and they only accept Word documents! So all that wonderful formatting (and unnecessary faffing about) has been a bit of a waste.
I presume other people have been able to use their epub versions, so I don’t know what I’m missing here!
Thanks again
Guido, really, this is soooo great!
I am looking at the test files in iBooks and Kindle and they are BEAUTIFUL! So much better than what I usually get, when I buy a book. It hurts to think that I will need to make a doc for Smashwords – because being in Germany, this is the only way to get onto some of the platforms.
Thanks again, Guido. I am mentioning you in the aknowledgemends! 😉
As you are spoiling us here, I dare to ask one more question. It would just be a nice to have, nothing essential.
With the TOC as you defined it for us, I only get links if I actually define a title for the chapter – and I would love to have something different for the Impressum, while still making it show up in the TOC.
My chapters start with a large top margin and bold 2em font, which looks a bit extreme for the Impressum, where I usually only have a small logo (.png) on the top of the page and write the necessary data below. I normally do not even write “Impressum” – even if that is what should show up in the TOC.
Could you think of an easy way to do this?
Thanks, Guido
You can always create a separate style that is invisilbe. That way you can have a description in it that will appear in the TOC but will not be visible on the actual page.
p.TOConly

{

  visibility:hidden;

  display: none;

}
Insert these TOConly-style paragraphs in the book at those points where you want the TOC entry to point to.
Now you will have to tell Calibre to include these paragraphs when building the TOC by changing the “Table of Contents” setting to
//h:p[re:test(@class, “chapter”, “i”) or re:test(@class, “TOConly”, “i”) ]
That should do the trick.
Thanks Guido,
from what I can tell, it worked beautifully!
:):):)
I just checked, Guido, and unfortunately the “invisible” styles are in fact included in the TOC but also still appearing in the text – although thankfully I can assign a different style. At first I thought it might just be the preview, but I went the whole way and tested the finished epub and mobi files.
I centered them now, just so it does not look too weird in case I do not get to make them disappear. Other than that I just had to include the pagebreak.
p.TOConly
{
visibility: hidden;
display: none;
page-break-before: always;
}
and later…
Weitere Titel
Same with the Impressum a little later …
Any idea?
Thanks, as always.
ok … I actually included the code in the body for “Weitere Titel”, but it is not showing.
You must be doing something wrong. I’ve been using this technique for many books and it works just fine for me. In order to post code and make the tags visible, use the < entity instead of the less-than sign to open a tag, like this
<p>
If you do that, it will correctly print as <p> in your comment.
<p class=”TOConly centered”><span class=”centered”>Weitere Titel</span></p>
now I got it. Sorry.
Why do you center this text? It’s not showing up anywhere but in the TOC, anyway, and the NCX TOC entries cannot be styled.
well, I centered it because I could not make it disappear …
And I cannot figure out where my mistake lies.
Send me your HTML file by email real quick.
Hi Guido,
let me add my thanks also. I have to admit, I wanted to format the easy way via Word’s filtered html and Mobipocket but once I saw the code generated, I quickly changed my mind. So between your guide, Elizabeth Castro’s HTML with XHTML and CSS book and a brief stop in Amazon’s Kindle Publishing Guidelines pdf to check supported HTML tags, I coded the CSS in Dreamweaver CS5 and ran it through Calibre then checked it in the Kindle Reader for PC. Unfortunately my double quotes and em-dashes were missing. Then I ran the html document through Mobipocket and everything was there with one exception – the main title was not larger despite the style. Should I just leave it then and upload to Kindle or try to figure out where I went wrong with Calibre and the coding? Does it matter whether one uses Calibre or Mobipocket if you do your own CSS? Thanks.
I am not really that familiar with Mobipocket, so I do not know how it would affect your styles, if at all.
What I don’t get is why the document looks fine when put through Mobipocket but have missing double quotes and em dashes in Calibre. But thanks.
In case someone else is having the same problem… What I ended up doing was a copy-and-replace with the same bit of HTML for em-dashes and quotes, again in Dreamweaver. For whatever reason, that did the trick and the result looks fine in both Mobi and Calibre. Go figure 🙂
Hello Guido,
Rather than learnijng this HTML language, my friend, a computer tech, ask me the following question. Why can’t I writed my e-book in word, do all editing chapter heads and such and then save it not as a document, but a .pdf file and upload it that way. He said it should appear the same way you are teaching with HTML. It would be a file that would open on an e-reader. He said that any time you download an e-book it automatically comes as a pdf file. Is this the straigt of it, or do I need to learn the HTML programming language.
Thanks, for your help and response to my post.
Sincerely,
Ron Nash
Ron, while many eBook readers can read PDF files, it is not a good choice for eBooks. PDF files are not free-flowing documents that are necessary to create the best possible presentation on these devices. What you want is an eBook that adjusts to different display sizes and capabilities. PDF does not do that. In addition, PDF support on devices is very spotty. There are many PDF features that these devices cannot display, or display incorrectly, creating garbled output.
If you do not wish to learn HTML, you can always hire someone like myself to do the eBook formatting for you – http://guidohenkel.com/ebook-services/
Guido:
Thanks for this incredibly helpful guide. I’ve been through it with great success and I’m about to republish a much better looking “Game of Sails: an Olympic Love Story” as a result.
One aspect I’d like to see more info about is including links, especially in the post-book sections. It seems like a great way to point people toward more info, but I don’t see it addressed here.
Thanks again for all your great info. I’m not a horror fan but have been recommending your series (and this great pub info) to others.
Guido,
This tutorial is excellent, thanks for your work.
I’m about to embark on my first ebook, and glad I read this before just following the info on Amazon’s website about using Word.
The book at the moment is handwritten so before I begin copying it into the computer, I wanted to ask a question which I haven’t seen answered in the comments (apologies if I have missed it though).
What software/workflow would you recommend I follow?
I am proficient in html and have access to Pages, Word, Dreamweaver and InDesign.
I was tempted to use Dreamweaver or text edit to avoid some of the ‘search and replace’ stuff, but obviously I then lose out from the auto-checking features of one of the word processors.
I would love to know what you think.
Thanks again,
Best regards
Dave
From the software options you listed, Pages would be my choice. It is lean and mean and has everything you need to get your book to the manuscript stage.
Hello Guido,
I’ve really enjoyed your guide – it has been a huge help for creating my ebook, thanks.
I do have a question, though.
I am producing a novel which is non-fiction and makes use of a few literary quotes (eg. a Bible quote). Because of this I am ‘double indenting’. In other words I like to block the quote in italics with broader margins on the left and right to set it apart from a usual paragraph. So, I have the usual style for the document, but then have the quotes indented even further.
The code looks like this:
p {
text-indent: 1.5em;
margin-bottom: 0.3em;
text-align: justify;
}
p.quote {
text-indent: 0em;
margin-left: 4.5em;
margin-right: 4.5em;
margin-top:1em;
margin-bottom:1em;
text-align: justify;
font-style: italic;
}
In a web browser this appears fine and I get my desired result (ie. 4.5em left and right margins).
Unfortunately Kindle is not recognising the margins and is only suppressing the usual 1.5 text-indent (by setting to 0em), while correctly using italics on that particular block of text.
In short, it seems as though you cannot set the margins within the ereader (in this case Kindle/Mobi) as it only seems to recognise the ‘text-indent’ style when formatting paragraphs.
Do you have experience with this? Is this correct?
Thanks for your help
David
The Kindle has various flaws when it comes to margins. For example it cannot do right margins or padding at all. In addition an indentation of 4.5em will take you probably to the middle of the page on the Kindle because em-calculations on the Kindle are not working properly and are at least twice, if not three times, as wide as they should be. Other than that, indentation should work. I’ve been using it myself on various occasions to set apart quotes.
Hello again,
In calibre there are 3 options (among others) for doing the Kindle/Mobi output: Kindle, Kindle DX, and Kindle Fire. Ideally, what should we be uploading to Amazon?
Thanks
David
I always use the “Default Output Profile.” To be honest, I have no idea what the other ones do.
Hello Guido,
Thanks for all your help. Just one more question 😉
2. November 8, 2004
I put that in pre tags, hope that’s right!
It doesn’t seem to work, I tried using span type chapters and it doesn’t work (I changed the code “//h:p[re:test(@class, “chapter”, “i”)]
” to @span but it didn’t work.
So I’m trying to make the date above smaller separately from the chapter number preceding it.
Am I on the right track here? Or is the P class tag overriding it?
Thanks,
Added <p>
Hello Guido,
Thanks for all your help. Just one more question 😉
<p>p class=”chapter”>2. November 8, 2004
I put that in pre tags, hope that’s right!
It doesn’t seem to work, I tried using span type chapters and it doesn’t work (I changed the code “//h:p[re:test(@class, “chapter”, “i”)]
” to @span but it didn’t work.
So I’m trying to make the date above smaller separately from the chapter number preceding it.
Am I on the right track here? Or is the P class tag overriding it?
Thanks,
Apologies for the multiple post,
Hello Guido,
Thanks for all your help. Just one more question 😉
<p>pre>
<p>p class=”chapter”>2. <p>i><p>span class=”onepoint”> November 8, 2004<p>/span><p>/i><p>/p>
<p>/pre>
I put that in pre tags, hope that’s right!
It doesn’t seem to work, I tried using span type chapters and it doesn’t work (I changed the code “//h:p[re:test(@class, “chapter”, “i”)]
” to @span but it didn’t work.
So I’m trying to make the date above smaller separately from the chapter number preceding it.
Am I on the right track here? Or is the P class tag overriding it?
Thanks,
Hi Guido,
Thanks for the guide. Another solution to the TOC problem above is to put //* in the ‘Detect chapters at (XPath expression)’ field in the Structure Detection section.
As this has taken half a morning to figure out it would be great if you could amend your blog entry for other readers. It appears to happen because Calibre inserts it’s own line of input in that field, in my case: //*[((name()=’h1′ or name()=’h2′) and re:test(., ‘\s*((chapter|book|section|part)\s+)|((prolog|prologue|epilogue)(\s+|$))’, ‘i’)) or @class = ‘chapter’].
Tested this twice with the output html from your tutes.
The other things that seem to be missing from the guide is page break info (unless I’m missing something) and how to force the TOC to the front. I know you don’t like that, but some do.
Actually just looked it up on the Calibre forum: “If you want a TOC at a particular location in your document text, create one by hand. So we strongly recommend that you leave the default as it is, i.e. with the metadata TOC at the end of the book.”
Source: http://bit.ly/xtObLs
Interestingly Kovid considers Calibre a tool for readers rather than producers.
Also including a how to add the other ‘go to’ sections of the book would be useful. EG, the ‘beginning’ just takes me to the copyright page.
Thanks for what you’ve done so far. 🙂
Actually if I’d just read the line before: “When converting to MOBI, calibre detects the metadata TOC in the input document and generates an end-of-file TOC in the output MOBI file. You can turn this off by an option in the MOBI Output settings. You can also tell calibre whether to put it and the start or the end of the book via an option in the MOBI Output settings.”
You go to to Covert -> Mobi Output and check “put genrerated TOC at front” – although Kovid doesn’t recommend it.
Thanks for the guide, Guido. I used it, with slight alterations. (I prefer the more modern em tag to the i tag, for example.)
The resulting HTML file produced a better EPUB than I could figure out how to make on Sigil, with the latest editions I could use on my outdated PowerPC Mac. (Note that both Calibre and Sigil have updated editions I can’t use.)
Unfortunately, though I converted everything into the HTML entities as you suggested (though I usually prefer using the numbers), the special characters did not display properly when I converted either the ZIP or the EPUB to a MOBI file with my edition of Calibre.
Also, when I tried saving the EPUB file to disk, it saved it as 3 separate files. It looks like I can delete the other two, but I found that odd, since by all accounts I’ve found, Calibre shouldn’t do that. (Yes, I’m hitting “Save to Disk,” not “Send to Device.”
The named entities are unrelated to Calibre and should display correctly either way. If they don’t I am assuming you did something wrong. Load the HTML file up in a web browser and see how it behaves there.
Calibre always saves multiple files – four in the most current version. It saves the eBook file, but in addition to it also saves the cover as a separate file, along with a meta-data OPF file and a ZIP file. You can ignore all these, except the respective MOBI or EPUB files, which contain the actual eBook.
Hi Guido, I am back again and you are awesome, I hope you are well boss, things seem to be working well, but I am stuck on something, again. Do I have to add code to include the front cover of the book and if so where abouts exactly do I put the code in the code style sheet thingy?(yes very technical I know :-P)
If you are using Calibre to build your final eBook, no you do not have to code the cover into the ebook. Calibre will automatically add the cover you are seeing in your meta-data screen into the eBook.
I’m very frustrated and disheartened. I’ve been working on getting a short story up on Kindle for longer than I care to admit. After trying it through Mobi to Kindlegen your blog was recommended to me. While I know a little html it looked quite daunting but I dug in.
I did customize the styles and made some h ones of my own because of how I want my story to look.
It looks GREAT on web browser. (And everything worked there) In Calibre after much trail and error and re uploading I got the TOC to work by using your chapter class display none code. I did this because not every place I wanted included is a chapter per say. One prob right away in the Calibre viewer was it took all my centered headings and moved them stage left.
It very much seems that Calibre takes our hard work, overrides it and pays no attention to our CSS style sheet. Still this was the closest I’ve ever come so I decided to look at it in Kindle previewer. There, all the text of where I put the hidden chapter marks showed up!!!
And the recurring problem I’ve had all along of the inside cover image (600 x 800) keeps running of the page on the right and bottom. And it said I had no TOC or correction it said I had no NCX file and the TOC which did properly list them did not work at all.
Why is this so hard? Kindle makes it sound easy.
Now I think I have to get rid of the hidden chapter display none code and go back and redo everything as an h tag and use that in Calibre. But I still can’t figure out why all my centered text keeps getting moved to the left. Is it Calibre? I do not want spaces between my paragraphs so I reset that there.
None of the links work in Kindle previewer however I believe I read that they won’t work there.
Ugh!
*Not just my centered headings. My centered text, too.
I am not quite sure why it isn’t working. There could be many causes for this. Calibre doesn’t really do anything to your styles and settings. I simply takes them and transfers them, so the issue has to be in your HTML/CSS source already. If you email me your stuff I’ll be happy to take a look real quick.
Thanks for the guide, Guido!
Thank you! This guide is excellent.
Hi Guido,
Almost completed my Dad’s books. Thank you so much for the brilliant tutorial and your help!
Incidentally I just found out that you can save the chapter TOC settings in
Preferences / conversion / common options, so now all you have to do is open the Convert Books tab and close it again immediately. Nice, they must have been listening to you 🙂
Thanks,
Josh
Here is another happy user of your blog. My gosh, thank you for this. You really are heroic in your help. MY QUESTION IS:
When I change [ellipses, en dashes, em dashes, smart quotes, and single smart quotes] as per your recommendation to [&hellip, &mdash, &ndash, “ &rdquo, ‘ and &rsquo] they appear in the book as &hellip, &mdash, &ndash, “ &rdquo, ‘ and &rsquo. For example,
&hellipI think Emily Brontë&rsquos sister, Charlotte, would say about Gothic Spring, &ldquoWhether it is right or advisable to create characters like Victorine, I do not know. I scarcely think it is.&rdquo &ndashDayna Hubenthal, author of the novel, &ldquoPersephone&rsquos Seeds&rdquo
YOU ANSWERED IT LIKE THIS: Actually, looking over your sample code again, I can se the problem right there. You are missing semi-colons.
The entities you have, like &hellip are incorrect. They need to be … with the semicolon at the end. &rdquo needs to be ” and so forth.
I also see that you have the word “Brontë” in your text. You will have to change the accented character also. It will have to become “Brontë”
That should fix the problem. Guido
Guido, you are an angel. Thank you so much for your generosity and your help. I will definitely buy one of your books. Any one with this kind of clarity of thought, will be a compelling writer. Very appreciative, dayna
Hi there! I was pointed at your guide by the romance author Courtney Milan, and wanted to pop in and thank you for the very clear, easy to follow steps. I’m a techie, and a Mac user, and I already had Calibre–so I’m pretty sure I’ll be able to take care of everything you’ve described here.
So thank you very much! 🙂
Hi Guido,
In my mobi file, I get lovely caps for the first few words at the top of the chapter, as I want. On my epub file, looking at it on NookStudy on my Mac, I don’t get the caps. Here’s the command I used: Text you want in caps case
Any ideas why I’m not getting it on Nook? Otherwise everything worked great!
Joanne
P.S. Also on Nook, the page lengths on the screen are all uneven. On Kindle for Mac, they’re uniform. On Nook, sometimes they stop two-thirds of the way down.
Sorry, me again, just saw that the command didn’t show up properly when my first comment posted. Let’s try this:
You won’t be able to post code directly. You will have to change the opening bracket of each tag to an entity, like this for example.
<p class=”test”>
A quick word regarding the Nook software reader. I would not recommend this for anyone to use. The Nook reader software is broken and buggy beyond belief and comprehension. It does not render your eBook in any way that is even remotely close to what it actually looks.
I recommend using Adobe Digital Editions instead, which is available for free and a much more compatible ePub reader.
Dear Guido, this has been great help. Thank you so much for sharing. It works brilliantly, and I’ve just decided to enlist your services for my next big project – the least I can do to pay you back in some way!
Very best,
Jens
Thanks! Adobe Digital Editions is much better. It still isn’t showing my caps, though. Here’s the code again:
.caps {
font-variant: small-caps;
}
The
font-variantproperty is not something that is generally supported by eBooks currently. While it works in some software and devices, it does nto work on others because it is not part of the traditional MOBI and EPUB specs. Only the latest incarnations of eBook formats support features such as this.You are using an incompatible/undocumented feature and therefore get unpredictable behavior.
And here’s the command in the text, though my son says you don’t need to see that:
<span class=”caps”>Tex you want in caps case
Oops, after the word case it should close with </span>
Feel free to delete my string of comments and corrections and only leave those that are pertinent to your readers!
Ah, thanks. Sounds like I should probably just take it out. Though if a format doesn’t recognize it, it doesn’t seem to do any damage.
Hello
Fantastic tutorial. Really got me into CSS.
I only have one problem, every time I check my work on the Kindle Previewer, it never recognizes the table of contents.
NCX View works
But it says “Table Of Contents Missing”
Any ideas?
Again, wonderful tutorial.
Evidently, the TOC has not been build properly in Calibre. Have you made sure to set your parameters properly in the “Table of Contents” section of the “Convert eBook” dialog of Calibre?
Hello
Thanks
It was on the TOC of Calibre that I hadn’t checked a box, the first box, which is Force Calibre to make the TOC.
I do have the TOC now, Amazon website previewer, Adobe, my Kindle, and Calibre all show TOC, but the Amazon Previewer on my laptop still says Missing TOC.
Have noticed that, when you use
p
{
text-indent: 1.5em;
margin-bottom: 0.2em;
}
This indents everything, including images and Chapter Headings.
So, when I come to centering Images and Headings, they are 1.5em too far across the screen.
How can I correct this, so that only the text has been indented across, and the images and heading are not, but are correctly centered.
Again, brilliant tutorial.
Hello, again
Sorted.
Kept text_indent 1.5em;
then on another class I created, which is called, p.chapter
I wrote
p.chapter
{
text_indent 0em;
}
This keeps the indents on my paragraphs, but allows me to center my headings and images, minus the 1.5em.
Thanks again.
You have got me interested in CSS and HTML
That’s exactly how you do it.You create a separate style for centered things and set the indentation to 0.
p.centered { text-indent: 0em; text-alignment: center; }
span.centered { text-indent: 0em; text-alignment: center; }
Thank you SO much for this tutorial!! I really appreciate the time it took you to write it up for us. It has been invaluable to me. You have my kind gratitude.
Guido,
Thank you for the excellent formatting guide.
I am just beginning to look at self publishing and without any formal training, am finding it all quite a challenge including using monsters such as OoWriter! However I am amazed how much useful information people like you and others freely provide, for the use and joy of all.
I wish you all the best in your endevours and I shall keep an eye on your most informative blog from time to time.
Hi Guido,
Thanks so much for creating the software AND a tutorial! wow, you invested a lot of time and effort and caring into providing FREE tools to people who need free stuff the most: starving artistes! I really appreciate the fact you’ve kept Calibre free. I’ve just released my first book and will learn how to use Calibre to make the conversions the best they can be. Once I sell a few, I’ll definitely come back to donate to your cause. We have to support one another, right? 🙂
In the meantime, all I can offer is a tiny bit of proofreading. At the top of this page, the 9th and last installment, you wrote:
This is the eighth installment of a series of articles. To read the previous one, please click here
I suspect you did a copy/paste from the previous page (that’s what I’d do!) and then just forgot to change “eighth” to “ninth.”
Thanks again for supporting us Indie Authors with your quality tools.
How are you at Twitter APIs? haha, I’ve been approaching Twitter tool developers asking for a tool to filter OUT by list — that is, rather than including in my view of Twitter everyone who matches a string, I’d like to EXCLUDE from my view of Twitter everyone who matches a string (and I’d like to make the string either a list I’ve created or a search string). That is, filter out my list of X and see my stream with just “everyone except X people.” Two developers so far have said they are trying to work on something already. One from Ireland said it should be ready by end of summer. I am but one of MANY Indie Authors who’d like to filter my stream to see it without all of the fellow Indie Authors I’ve reciprocate-followed. I also heard from non-authors who’d like that tool. I’ve asked the Twitterverse at large probably once every other month for over a year 😉 I keep hoping! So do others 🙂
-Friday
@phoenicianbooks
http://about.me/FridayBaldwin
Now Available: Conditioned Response (Phoenician Series #2)
A SciFi Thriller to Remember–if You Can!
https://www.smashwords.com/dashboard/stats/150558
I think I need to point out that I did not write Calibre. That is someone else’s software. I am simply perusing it in my process.
Well, you’re doing an outstanding job! I just got the software installed and am trying to fix my book so Amazon will make it look nice instead of like crap. The ePub from Smashwords’s Meatgrinder actually looked okay, but Amazon’s conversion process totally ruined my book’s layout/formatting. All the paragraphs run together which is probably as easy as one little CSS fix and I’ll be done…but I’ll still let Calibre do it for me 🙂
And I’ll still donate a bit of thank you for writing these lovely tutorials because you pointed out how to do stuff I understand and would even have known if I had ever thought of it but it would never (forex) have occurred to me to use “invisible” attirbute to make a graphics chapter heading still work as a source for TOC generation! Awesome sauce with a cherry on top!
-Friday
@phoenicianbooks
http://about.me/FridayBaldwin
Now Available: Conditioned Response (Phoenician Series #2)
A SciFi Thriller to Remember–if You Can!
https://www.smashwords.com/books/view/150558
What an absolutely thorough and fantastic guide in every sense, I really wish I had found this before!
I have spent many frustrated hours attempting to bring my unruly formatting under control and whilst I did finally manage a presentable format, I was still left with so many niggles that refused all my attempts at being put straight.
Brilliant set of articles and I shall certainly recommend them to anyone I read or hear of struggling with similar issues.
You have my thanks and gratitude.
This guide has been an absolute lifesaver. I’ve managed to get everything exactly how I want in my ebook, but I’m having one final issue.
When I load the finished ebook onto my kindle, it opens to Chapter 33, instead of the first page. I’m not sure if this is an issue with my HTML or an issue with Calibre. Any suggestions would be appreciated.
Never mind. Figured it out. Just suffered a moment of panicked stupidity. Crisis averted! Thanks anyway!
Thank you very much for this amazing guide. I used your advice (as well as some other tips from around the web) to create an ebook version of a series of blog posts.
I’m having a weird display problem with the mobi version of the ebook: The ebook has endnotes, with the links in each endnote back to the original text. For 2 of the 13 endnotes, when I jump back to the text from the note, the first line of text on the kindle screen starts with a bit of code like:
p height=”1em” width=”0pt”>
This happens on a regular Kindle and in the “Kindle Previewer” app for Mac but not in the Kindle apps for iOS or Mac.
Any idea what could be causing this?
TIA
Hard to tell from a distance. I would have to see the actual HTML code for all of this.
I emailed you the files. I’d appreciate any time you can spend on this.
Is your series Take pride in your eBook formatting available as an ebook? It would be useful to have as a resource on an ebook reader.
No, I am afraid it is not at this time. I worked on an eBook version some time ago but have stopped working on it, as I could not make the time.
Guido, thanks a lot for this guide. I have followed all the steps and after two days of trial and error I’m happy with the results except for two things. The first one is that I can’t see any page breaks when I view the book on Calibre or the Kindle app on my computer. I included the page break command on the paragraph chapter, like this:
p.chapter
{
text-indent: 1.5em;
font-weight: bold;
font-size: 2em;
page-break-before: always;
margin-top:4em;
margin-bottom:0em;
Then, on calibre, am I supposed to click on “none” chapter mark on the Structure Detection? I’ve done this but still, it doesn’t work.
The other problem I have is with special characters. I replaced all the mdash, ellipsis, etc. on Word, like you explained. Then on Notepad++ I found and replaced all the special characters for á, é, í, ó, ¿, ¡, etc (I write in Spanish). This worked. I also replaced the dashes, quotes and apostrophes with their corresponding name tags, but this didn’t work. On the browser and calibre viewer they appear as &mdash, &ldquot, &rdquot, &apos, and &euro. What am I doing wrong?
Thanks in advance and sorry if you have already answered these questions. I’ve gone through the others’ comments but didn’t find the answers I was looking for.
I figured out what was wrong with the mdash, etc. I was missing the semi-colon. Sorry about that… I did find a comment by someone else here with the same problem. I still have the page break problem, though. Help please.
Hi Guido
I have formatted my book and it looks great, thanks very much! One hitch: the photos I have in the text show up in the preview mode of Calibre, but not on my Kindle when I load it. The cover shows up on the Kindle – perfectly. Here is an example of a description for one of the pics:
Could you please help?
You may have the path wrong for the images.
Thank you very much for the tutorial. It’s been fantastic and my manuscript looks perfect.
The only thing I’m wondering about is how to get my table of contents centered on the page? Calibre put it in perfectly, but it’s all left aligned.
Any help is appreciated. Thanks.
Sorry for a second comment, but I was just wondering if you knew how to create a start location for the “beginning” of the book when people download it? I’m talking about a .MOBI file for Kindle.
At the moment it just opens at the table of contents instead of Chapter 1.
I have put my table of contents at the front, as per Amazon’s request. I’ve thought long and hard about the pros and cons and decided I want it at the front.
Hi Guido,
Thanks so much for this online guide. It’s been very helpful.
I have a few questions that I seem to be having a problem with:
1. For some reason the Table of Contents isn’t generating for me. I input what you say into the field but when I open the file it’s not there. I’m not sure if there’s other stuff I have to add in those fields?
2. How do I create page breaks in HTML for non-chapters, like About the Author, Copyright, etc? Right now the dedication looks like it’s right about Chapter One.
3. Is there a way to create spaces between certain paragraphs? (For example: I have my author page, which I’m not indenting, and then a line after that I have info on website, etc–I would like a space between those two but writing isn’t doing anything.)
Thanks for any help on this stuff!
Hi Guido:
A couple of questions arose today, which I shared with JW Manus. She was stumped, so I thought I’d ask you.
First, do you know where the epub file derives its notion of “page” from? I load my document and the created epub claims it has 410 pages. I do know it has 187,000+ words, so it may be that the page count is just a function of word count divided by an average word-count-per-page value.
Second, at “page” 56 and at page counts that are multiples of 56, the renderer (in my case, both a Nook Tablet and the Nook-for-PC software) force an odd page break where none should exist.
Third, when using your schema of adding an HTML to Calibre, how does one also add in image references? I could not seem to find a way to accomplish this.
Fourth, when using Calibre to generate TOC, is there any way to also have this inserted into the document? I could do it by hand if necessary, but I don’t have a clue where to start.
Thanks, and sorry this got so long!
Guido,
I read your full article very carefully and am thankful for time time you took to write this all out. Thanks for all your time.
I’ve read that there are some byte size restrictions in epub files so that individual html files can only be a certain size. I know that size is pretty big and does NOT include images so for the most books, it’s not an issue. So my question is this:
After doing all your things and then exporting out of Calibre, does it separate each chapter into it’s own html file? If not, would having only one html file for the entire book create any lag as the reader reads it on their devices?
Over the weekend, I plan to run a test of a sample book by following all your rules. I’m curious as to how long the process will take me.
Also, I will probably use JEdit as you suggest as it’s cross-platform. I am a Dreamweaver user, which I know is cross platform but I like the idea of having a free cross platform solution as well.
Many thanks again,
Paul
Part of the EPUB format is defined by the fact that every time you insert a page break, you are essentially looking at a new HTML file, inside the book. This doesn’t affect that you still create a single HTML file as a source, since, as you correctly suspected, Calibre is chopping it up into pieces as it creates the actual EPUB file. And yes, after having formatted over 500 books have not once encountered a book where the HTML file size became an issue.
Guido, I have been using your guide religiously and I have been so grateful for it. I recommend it to everyone! You are awesome for doing it.
Quick question: I have heard all this stuff about things changing with the new Paperwhites and the Kindle fires, too. I see you did a post on this regarding images.
I have heard font sizes are a problem – I am guessing this guide is okay in light of that because you are using the “en” sizing bit. (sorry, I’m very tech challenged but that is my assumption.)
But I have also heard there is an image or library problem with going from prepared html docs to calibre on these new kindles. (the cover doesn’t show up, or something about the books marked strangely). I kind of don’t understand the whole thing. Maybe this doesn’t even apply to the formatter.
I guess my question is a yes or no one: in view of the new paperwhites and new touch kindle stuff, is this method still working for you in your formatting on such devices? I don’t have one of these machines to test on, and I understand the downloadable tests aren’t reliable.
Thank you !!!
Carolyn, I have not heard anything to the contrary. I have neither a Kindle Fire, nor a Paperlight, but I have not heard of any issues like the ones you mentioned.
Okay, just FYI, I had something done by this method tested on a Paperwhite, and all is well. Yay! Thanks again.
Guido, you are truly wonderful for putting up this guide. I read through it today and I was astounded by the work and time you put into this. Thanks are not enough.
I will be purchasing one of your books to support you and as a thanks for doing this. I will most definately be using this guide as I format my own books in the future.
You are my hero of the day!
Thank you very much for the tutorial. It’s been fantastic and my manuscript looks perfect. I also purchase one of your books to support you.
Yet strangely in the TOC only the first half of the chapters are linked correctly. When I click at any chapter in the second half nothing happens. Do you have any idea?
Sorry, but without looking at the actual HTML code, I am not sure what could cause this particular problem.
Man, this tutorial is great. One thing I wanted run by you, though. I followed the steps you’ve outlined, using Calibre to convert my html doc to .mobi for Kindle. Although the file renders perfectly in the Desktop Kindle Previewer referencing all available devices, the Online Previewer shows some wackiness with the left margin.
There are whole blocks of text where the left margin is indented a couple of ems further in after a new line.
I’ve gone over and over the html file and css. I’m pretty familiar with html and css. I’ve ran both through the W3C Validator and everything checks out. I, for the life of me, cannot figure out what could be wrong.
Since the .mobi displays perfectly on Kindle for PC and the Desktop Previewer, I’m wondering if the issue could be with the Online Previewer?
If you have any ideas, I’d be one happy camper.
Again, thanks.
The online previewer is completely whacked. It renders half the stuff incorrectly.
I found that by removing the padding in the .css file, corrected the problem. Everything looks as it should in both the online and desktop previewers.
Again, thanks for this awesome guide.
Regards
DLM
I’ve been hearing that KDP is rejecting .mobi files created by Calibre. I’ve also heard others say that it’s not Calibre in particular, but .mobi files that are not properly coded in general.
Have you heard anything about that?
Regards
DLM
The only thing I’ve heard is that they were at one point rejecting KF8 files created in Calibre, but I’m not sure if that is even the case anymore.
Guido, this guide is awesome, you’ve just helped me format my first e-book and it looks great. Incidentally, do you have any ideas on HTML code for a title page and acknowledgements page before the first chapter heading?
Cheers,
Antony.
Guido,
Thank you so much for taking the time to do this HTML formatting guide, it has really, really helped me.
Legend.
Can you think of any reason why my cover image would not show up in the epub? It looks fine in Calibre, but I’ve checked with Digital Editions and Nook PC and it just shows a blank where my cover should be.
Never mind. Figured out it was because my cover was CMYK not RGB. Fixed that and everything worked fine. Thanks a lot for this great series. Now that I have the basics, I’m looking forward to doing something fancy. 🙂
Notice Alisa asked why Calibre generated TOC labeled each chapter as “unamed” – but didn’t see any answer. I’m encountering the same issue, despite experiments with the code. Converting HTML to MOBI. Any ideas?
Forward
Without seeing the actual code and Calibre set-up it is impossible to say why this would happen.
”
Forward
”
Calibre is pretty much default although I have tried variations, same result.
This comes back as “unnamed” but does link correctly, so only the title is missing. I tried adding title=”name” but NG.
I let Calibre find tag h2, attribute class=chapter.
code I posted doesn’t seem to come thru so here it is without the brackets:
div class=”chapter”> /div div
h2 a name=”Forward” id=”ch01″ Forward /a /h2
/div
Why so complicated? Here’s what I usually do
<p class=”chapter”>Forward</p>
And then I tell Calibre to look for all chapter paragraphs using this XPath expression
//h:p[re:test(@class, “chapter”, “i”)]
And that’s it. Perfect TOC entries.
Well, that did it, many thanks!
I have tried Calibre many times to convert the pdf of my book, which has many many small images plus tables and charts. The pdf file has all the ToC and links for bookmarks and crossreferences. First of all, Calibre does not do the conversion to epub or Mobi properly at all. It separated the text from the omages and the tables were all messed up. I finally created an image-based pdf of my book (I turned each page of the book to a png file then merged them back to create a single pdf. I then created the ToC (3 levels) for this pdf file manually. Of course, there is no way to do the bookmarks and crossreferences at this point. Calibre, at this point, was able to convert the entire image-style pdf to ePub and Mobi successfully, but with no ToC. How can I ask Calibre to take the ToC from the pdf (Image-based) input file to the ePub and Mobi it generates???
By the way, I have tried to convert from the original word file of my book to HTML files using WORD. It did not work very well because of of all the images and tables.
PDF files are entirely unsuitable to be converted into eBook files. Word processor files work sometimes if you have been extremely careful how you put it together, religiously using styles, or else it will completely break as well. But that is exactly why I have created this tutorial, because there is no shortcut to creating good eBooks – other than hiring a professional like me, perhaps. 😉
I’m reading reports that Amazon is no longer accepting Calibre-converted files, and that the Kindle Fires are not reading current Calibre-created .mobis properly. Just wondering what you know about this and what you suggest. Thanks!
This affects only books that have been created in Calibre as KF8 files. Amazon accepts MOBI files generated by Calibre just fine. As for Fires not reading MOBI files properly, I have never heard of that. I would suspect it is more likely to be related to poor formatting in the first place and has nothing to do with Calibre.
Thanks, I’m glad to hear that, since I find Calibre so easy to use. Although I have heard from several people who were told explicitly by KDP in emails that they no longer supports any third-party conversion software. I will try with Calibre, but I’m curious…what are your thoughts about simply uploading your well-formatted html document to KDP? They say they accept those and convert on their end.
Sorry…one other question. If you use Calibre to create MOBI files, can theys till be read on Kindle Fires and other, newer Kindles?
Yes, of course.
I’ve been using your method for a couple of months and it works well. However, I came across an issue today. For the auto-generated ToC, is it possible to increase the spacing between the individual chapters? I only have 5 chapters in my book and the page just seems jammed up. Wondering if there is a setting, I’m assuming somewhere in Calibre, to provide more line spacing or a line break.
I haven’t looked closely into this, but it should be possible to modify the style that Calibre is using for the TOC and add additional spacing there. Since you only have 5 chapters, you could always hand-code the TOC also and then tell Calibre not to include the auto-generated HTML TOC.
If I’m converting to .mobi, do I just put that hand-coded ToC at the beginning of my file? I obviously want it so that when someone is using the kindle app, that when they click on the ToC button, it takes them to the page I created. That’s mainly the reason why I let Calibre auto-generate it.
Yes. Just create a separate page with the TOC and hotlink the entries directly using <a> tags like you would in any HTML documents.
HI! Thank you so much for this amazing tutorial. I’ve learned so much and have a great looking mobi ebook. It looks great in a browser, on kidle pc, and calibre reader. However, I can not view it on my android. Also, the mobi file looks good in web browser, great in calibre viewer, but will not even open/appear on nook pc, android nook, or an actual nook reader. What the heck did I do wrong? I”m hopeing there is a simple answer withough having to start over.
You did nothing wrong. MOBI files are for use with the Kindle only. The Nook uses the EPUB format.
OOps! I mean that the epub, won’t open in the nook pc reader or on my sister’s nook. it will open in Adobe Epub reader, browser window, and calibre epub reader.
Nevermind, nonen of us knew how to transfer files apparently. Working on all devices now!
Thanks! My book is coming along splendidly.
Great guide Guido
I have converted my book and uploaded to Kindle, I also spent ages creating a clean Word doc for Smashwords. While uploading that I found you can now upload Epub to Smashwords This is where my problems starts. All links and generated TOC work fine on Kindle, the Epub file works fine on a computer Calibres readers. but the Epub file fails on uploading to Barnes and Noble. The error message I get is: “attribute “name” not allowed here; expected attribute “accesskey”, “charset”, “class”, “coords”, “dir”, “href”, “hreflang”, “lang”, “rel”, “rev”, “shape”, “style”, “tabindex”, “target”, “title”, “type” or “xml:lang”:
This message repeats file 9 files :tsom_split_012.html – 020.html. My book has 9 chapters and 9 internal links, bit unlucky they happen to be the same, so I assume there is a problem with one or the other.
Barnes and Noble say the Epub file must comply to http://validator.idpf.org/
even thought the file seems ok on Calibre software this site rejects it. Any ideas?
This indicates that your HTML has some minor issue somewhere. Oftentimes it is simply a misplaced tag or a missing tag. Without seeing the actual HTML, however, it is impossible to determine what is going on. My guess would be that your <a> tags are not formatted correctly. Instead of using the “name” attribute to link to them, use the “id” attribute instead.
I’m about to publish a new book on Amazon, and I’m leery of downloading Calibre’s latest upgrade. I’ve never had a problem uploading Calibre to Amazon before, but, as I posted above, there have been some reports of issues lately.
Am I better moving forward with v. 0.9.9 which is what I used successfully last time or upgrading to the latest version?
Thanks, as always, for your help and advice!
Joanne
I have written a non-fiction how-to and the TOC has multiple sub entries that I want to link to specific words within chapters so the reader can click on specific topics and go directly to the answer. Do you have suggestions for doing this?
I’ve gone through the guide and formatted my book, and so far it looks great. The only question I have is, when converting it in calibre to a mobi output for Amazon, do I choose old, new or both?
The kindle previewer is acting very strange, and will not allow me to change the font face. But I have a feeling it is an issue with that program.
Dan unless there is a very specific reason for it, I seen no point in using the KF8 format. For the most part MOBI is fully capable of handling novels and what’s more important, it is supported on all Kindle devices. Keep in mind that KF8 is supported only on a few selected versions of the Kindle.
Thanks. I chose the “old” mobi version.
I’ve read a lot of post saying Amazon doesn’t accept calibre mobis. Have you experienced any issue with this? Just curious.
Thanks again.
Dan
That is only half the truth. Amazon does not accept KF8 MOBI files created with Calibre. They accept standard MOBI files just fine.
Aaah, that makes sense. And I’m glad, because my book looks beautiful. Thanks for replying so quickly to my questions, I really appreciate it!
Hi Guido – just one more question for you, if you don’t mind. I am formatting an ebook that has a table in it, 5 Columns, 8 rows. I used the relevant “”
and and coding but when I convert to epub and mobi formats, its all a mess.
I mean “mess” in that in the calibre reader the grid comes out fine and the text is aligned to the left like I told it to be readjusts well. In the Kindle PC reader – the grid looks odd with paragraph indents that look ugly.
For both readers the text goes off the reader on the right hand side if the user sets the font “too large”
My CSS for the table is:
p.table
{
text-indent: 0em;
margin-bottom: 0.2em;
font-size: 0.5em
}
and seems to be being ignored as the text is the same font size as the rest of the book.
Any ideas on how to handle best? I considered putting in a jpeg but considering everything else you’ve written here that seems like an “ugly” handling.
Thanks so much
I would have to see the actual HTML code but what immediately jumps at me is the fact that you’re using a table. Tables do not work on the Kindle. They will always be garbled and messed up on anything but the latest Kindle tablets. It is sad that Amazon has never addressed some of the serious flaws and shortcomings in the Kindle firmware, but there it is…
Thanks Guido for the informative article. My problem is simple. When i convert my epub to mobi in calibre the title page is always missing. My title page comes after cover but before credits page. Is this a bug? Have tried updating calibre and all combinations of settings.
Not sure what could be causing this. I’ve never used Calibre to build a MOBI file from an EPUB, I’m afraid, but I don’t really see any reason why it would arbitrarily drop pages. Are you certain it is gone and not that the previewer just opens on the page after it?
Hello,
I’m entirely new to the e-book idea, I do not even own an e-reader! how ever being a published author is a life long dream. i am currently formatting my book using your steps. One question I have not been able to get answered clearly from anyone (or been able to find the answer to on my own) is this, Can I legally use song lyrics in my book if I credit the artist at the end? Or do I need to get permission from the artist first? If this is the case, what if the artist is deceased? Any help you can offer in answer to my questions would be greatly appreciated!
Thank You,
RF
Sorry but I am not familiar with the legal implications in that case, and I would rather not speculate to be honest.
Hey man, thanks for the guide. I have a question though, I converted the zip to EPUB no problem, TOC working and everything. However when I convert to MOBI from either format, my chapter headings get way bigger than they’re supposed to be, despite being the correct size elsewhere. Any advice?
hey man just a heads up I got it working, used another program. Thanks for the guide though, helped me a ton.
Fabulous! Thank you, Guido.
I work daily with HTML and CSS but in a website context. I learned a lot from your 9 articles especially about the use of the “em” measurement and not specifying a font.
There is no substitute for experience and your knowledge of what HTML syntax does and does not work will be invaluable.
I have one question. My novel quotes from another book. I want the quotations to be in a different font. For example, the main text in printed format might be Times New Roman and the quotations might be Arial. However, since I can not define a font, how can I achieve this?
I did think of putting the quotations in italics, but I find large chunks of italics hard to read. I could use a slightly smaller text size. I could also put some sort of delimiter in. Do eBooks Support the <hr> HTML tag?
You can still use the font-family attribute, but use the generic font settings, such as serif, sans-serif and monospace, like this
p.newfont { font-family: monospace; }
As for the HR tag, yes it is supported but the appearance of it is highly unpredictable, I found. You could always make a small line image yourself and then print that instead.
I have a small suggestion. Recently I had this experience on my Kindle – I reached the end of the text, but I could not tell if it was the end of the book. Some books have inconclusive endings, others have an epilogue after the story proper has finished, so it can be difficult to know.
With a printed book, the back cover is still in place and no pages have fallen out, so you know when you have got to the end. But with an eBook, it may not have downloaded properly, or the originator may not have uploaded it properly, so it can be tricky to determine whether or not you have the whole thing. (Not all eBooks have a chapter index you can check.)
So here is my suggestion. After the last sentence in your eBook, have a final chapter heading of “The End”. That way, ever reader will know that there has not been a technical glitch somewhere along the line.
*every* reader, not *ever* reader, sorry.
Most authors I have been working with have either “The End” at the end of the book or some asterisks to indicate the end of the text.
Do you have an alternative to calibre? I get an error message when attempting to save to disk and I can find no reference to it via Google. It reads “calibre, version 0.9.35
ERROR: Not allowed: You are trying to save files into the calibre library. This can cause corruption of your library. Save to disk is meant to export files from your calibre library elsewhere.”
I’ve never seen that error message. Did you try to change the path where you want to save your files to? It sounds to me like you’re trying to save into a directory that Calibre views as own its library directory. If not, ask the guy who wrote Calibre. He is very active on the Calibre support forum.
Thanks, Guido. The Calibre forum gave me enough of a hint to work it out. Somehow, the whole of my Mac was the Calibre library, so I could not save anything. The answer was to relocate the library to a sensible sub-folder.
I have found it necessary to go back and make adjustments to some of my completed books but only have the mobi files available. I converted the file to htmlz in calibre but was jedit would not recognize the encoding. Any suggestions? I would prefer it if I did not have to start from the original manuscript.
Thanks Guido. I am totally blown away by how easy these steps actually are. I am going to print out every page of this series and see if I can do this on my own with my first novel. I had been looking into ebook formatting services, but after reading through this, I have a feeling this is something I might be able to pull off on my own. It sure would save me a few dollars. And we all like to save money after all.
Cheers,
Michael
Best guide I found, and I searched EVERYWHERE… (=
Thank you so much! I like to know how things work “under the hood” as well, and it totally makes things less intimidating.
And now that this step is done, it’s time to begin the eBook publishing and marketing [=
Thanks again!!
Amazing article! I’ve followed your instructions to the letter and am very impressed with how awesome my book looks now! However, I’ve run into a few issues when it’s actually converted to the epub and mobi.
First, when I had the extra stuff in the tag about the version and everything, calibre insisted on putting that stuff in the final file. Not sure how that’s happening, but once I took all that stuff out and just had at the beginning and at the end, it worked perfectly. Is that stuff needed for one of the uploading sites or something?
Secondly, and more distressing, I can’t seem to get my text to get any bigger than 1.5em. I set up my class tags exactly as you suggested, and the text is indeed bigger when I look at the clean html file in a browser, but as soon as it’s converted to mobi or epub, it scales down to 1.5em. Any suggestions?
Other than that, I couldn’t be happier! This is by far the clearest, most helpful guide I’ve found, and huge kudos to you! Thanks again!
One thing you omit: how to create a table of contents that links to each chapter. I suspect I’m going to have to look up how to make a hyperlink that goes to a particular point in the document, and then make sixty hyperlinks from the contents to the chapters and from the chapter ends back to the contents.
This has been marvelously useful, though, thank you very much!
It is covered, I believe, in the last part of the series where I explain how to set up Calibre, as Calibre can automatically build the TOC for you.
Thank you for writing this, it’s been a tremendous help.
Holy furball! I followed your instructions and everything worked! My ebook looks fabulous and it was totally painless to get set up. THANK YOU!!
Hi Guido,
Phenomenal guide. Thanks for taking the time to put this together for us. I discovered it while reading David Gaughran’s “Let’s Get Digital…” book.
My question involves hanging or floating quotes. I have a couple of places in my manuscript where I paragraph or two represent a letter that the PoV character is reading. I like to represent this by increasing the indent on both left and right sides (as well as italicize) so it’s clear something different is going on.
What are your thoughts about using the “blockquote” tag? To your knowledge is it rendered properly on multiple formats? If not, how can I best achieve this look?
Many thanks.
<blockquote> is not part of the original MOBI specs ad I do not think of the early ePub specs either, so I would not consider its use because it will not display properly on the early Kindle generations and other eBook readers.
The easiest way to do this is to use the DIV tag instead. Create a styled div and call it blockquote, if you wish, to achieve the same effect.
Much appreciated! I’ll change my style sheet.
Guido, what a great guide for a technophobe like me. It’s a gift you have, the ability to explain things so clearly. Thank you very much for all the work you put into this tutorial.
A future post for displaying photographs on an ebook page — position, size, etc. would prove very useful, especially as devices’ displays improve. I have a guidebook with color photos in the starring role I’d love to convert to ePub, as daunting as that sounds right about now. Also in my historic novels I use photos predominantly as well.
Hello Guido
First of all, I want to thank you for your wonderful generosity, and your fine work in providing us with this most awesome resource. I managed to create a beautiful looking Preview E-Book as my first project. It looks great in the Calibre Viewer as well as the Adobe Digital tool. Kindle is another matter though. The book cover does not appear when viewing the books from the Kindle Library. There’s just a picture of a blank book. The cover does show once you open the book to read it though, and the interior of the book shows flawlessly.
Do you have any thoughts as to why this is happening? I even changed the cover type from jpg to png. No difference.
Have you heard if there is any truth as to the rumors that Kindle will not accept E-Books from Calibre, or I have I misinterpreted this?
Once again, many thanks for all of your work. Totally awesome!
Thanks,
Rick
PS: When filling out the comment I entered my blog address, but the blog is locked at the moment until I feel it is ready to go live. Blog will be for the promotion and selling of my short stories and books as well as a meeting place for writers and illustrators.
Rick,
The missing covers seem to be a software glitch of the Kindle software. It won’t happen once the books is uploaded to Amazon and delivered to the device through their system.
It is not correct that Amazon will not accept books built with Calibre. It is a rumor that got twisted along the way. The reality of it is that Amazon will not accept KF8/AZW3 files created with Calibre. They insist you use KindleGen for that. If you stick with A MOBI file, however, Amazon accepts your book just fine.
This is great news, Guido. Thanks for getting back to me so soon.
Once I have several short stories ready, I will have to get an illustrator to do the cover art. Do you have any recommendations on how to get some decent cover work done at a reasonable rate? At least until I generate some income from my short stories.
Thanks,
Rick
Rick, we do covers for authors, if you’re interested. Our base price is $350 for a standard cover like the ones you see here – http://guidohenkel.com/cover-services/
Ping me if you’re interested.
Guido, I am definitely interested. Can I email you at the dev address I saw on the eBook services page?
Thanks,
Rick
Yes, absolutely. 🙂
Guido,
One thing I seem to be having a problem with is transparent gifs, specifically when I compile to the Kindle format. I’m told that Kindle now supports transparency, but my transparent chapter headings (and other transparent images) always show up with a white background when I view the manuscript on the desktop Kindle viewer and the iPad Kindle app.
Do you have any advice for making sure my transparent images stay transparent? The white background is ok, providing the reader is using a white background. But when they choose sepia or black, all bets are off.
Thanks for any advice you can offer!
Nat
To the best of my knowledge, the Kindle still does not support transparent images. The Kindle Fire, perhaps, but none of the eInk devices do.
Thanks, Guido. I guess I’ll be stuck with the white background for now.
The only other issue I seem to be having with the process is that when I produce the MOBI file with Calibre, then use “send to Kindle” to get it onto my device, it shows up on the device (and in my Amazon library) as a “Document” rather than a “Book”. This worries me because I don’t want it showing up as anything other than a “Book” when I publish later this year.
Is this just an artifact of using “send to Kindle” that I won’t encounter when I actually publish, or does it sound to you as if something has gone wrong in the process?
I’ve never used the “Send to Kindle” feature, but what you describe might be a setting in Calibre. I always load books onto my Kindle manually for testing.
Either way, however, I would not worry about it because once you publish it through Amazon I am certain it will properly categorize as an eBook.
Thanks again, Guido! There’s a steep learning curve, but thanks to your guide I’m sure I’ll be an old pro before long 🙂
Guido, I notice that this last installment instructs us to embed a 600X800 pixel cover image into the ebook. But a later comment of yours added to part VI (in Sept of 2013) reads, “At this time I would make a cover no smaller than 1024 pixels wide. Since the current generation of iPads has a resolution of 2048×1536 pixels, that is the resolution I would go for if you want to stay on the high end.”
I assume the larger mentioned size is more current, but moving beyond assumption, let me ask three questions:
1. What is the size at which you’re creating your (to be embedded) cover images today?
2. Do you still use the same, single image file for both the ePub and mobi files?
3. Does this mean that, provided the aspect is preserved at 3:4, all the legacy 600X800 pixel readers have no problem shrinking a larger image to fit their screens? (I’m not sure if ‘preserve aspect’ is a Calibre option for Mobi creation as it is mentioned above for ePub creation.)
1024 is still the size I’m using these days. Anything above that blows up the size of the eBooks to an unreasonable bulk that, in the end, the authors have to pay for. Since there is very little benefit in having even larger covers, I don’t see why they should be penalized, since the majority of eBooks are still sold for eInk devices with lower resolutions.
I do use the same images for both formats.
The aspect ratio is virtually irrelevant because you never know which device/software your book will be displayed on an each device has a different resolution and aspect ratio.
I converted the html file to epub and tried to read it in the Calibre reader and it still shows it in html. I also tried to read the epub file on the Adobe Digital Editions and it did the same thing. I’m missing something very important, but not sure what it is. Do you know?
I am not sure what you mean by “it shows it in HTML.” Do you mean it still shows the actual HTML tagging?
yes
In that case it would seem you have somehow skipped the building step or it was somehow corrupted. Feel free to send me your HTML file and I’ll take a quick look to see if anything stands out right away.
Thank you SO MUCH!
html, body, div, h1, h2, h3, h4, h5, h6, ul, ol, dl, li, dt, dd, p, pre, table, th, td, tr { margin: 0; padding: 0em; }
p.centered
{
text-indent: 0em;
text-align: center;
}
span.centered
{
text-indent: 0em;
text-align: center;
}
p.title
{
text-indent: 0em;
text-align: center;
font-weight: bold;
font-size: 2em;
margin-top: 6em;
page-break-before: always;
}
p.by
{
text-indent: 0em;
text-align: center;
font-weight: bold;
font-size: 1.5em;
}
p.dedication
{
text-indent: 0em;
text-align: center;
font-size: 1.0em;
margin-top: 6em;
margin-bottom: 6em;
page-break-before: always;
}
p.chapter
{
page-break-before: always;
text-indent: 1.5em;
font-weight: bold;
font-size: 2em;
margin-top:5em;
margin-bottom:2em;
}
p
{
text-indent: 1.5em;
}
PS
By
For Terri
One
<!–
–>
Trying to figure out how to send you the tagged stuff. Hope this works.
Anyway, I just copied from Part VII. Can anything become corrupted from copying?
Thanks, Guido, for your quick answers to my questions. One answer prompted another question. If aspect ratios are virtually irrelevant, should we still be selecting ‘preserve cover aspect ratio’ from the ePub output section as instructed above in the tutorial?
Yes, because you do not want the cover to be distorted. You want it to be scaled proportionally.
Thanks again, and I can’t believe I forgot to ask this: at what dpi do you make this (to be embedded) cover image? I’ve heard everything from 72 to 170.
dpi is completely irrelevant. It is a measurement for print output that determines how your pixels are translated into print dots. For images on computer displays the measurement has no relevance at all.
Hi, Guido –
Your guide is amazing. I have one problem that I believe is specific to my Kobo Touch, the base Kobo model. Let me see if I can describe what’s happening.
What I’m looking for, and what I see in professionally created books from the big publishers is something like this:
Cover page – Cover image takes up the entire space and no page #’s at the bottom
Dedication page – Has “Dedication” at the bottom and no page numbers
Chapter 1 – Has “Page 1 of 14” at the bottom, counts up properly, no page numbers along the left side
Chapter 2 – Has “Page 1 of 18” … etc.
What’s I’m seeing when I convert using both Calibre and Sigil:
Cover page – Has white space at the bottom and “Page 1 of 350” at the bottom
Dedication page – “Page 2 of 350” and a page number along the left
Chapter 1 – Has “Page 3 of 350,” counts up improperly based on page numbers on the left side (So for instance, 1.5 pages = 1 page)
This is a problem I see with a lot of self-published books, and it’s one I can’t seem to get rid of using either of those programs. I’ve googled until my fingers fall off, and I can’t find anything addressing this issue. I tried making one HTML per chapter/section and linking them together in an over-arcing HTML. It didn’t work. I’m going to keep looking, but I was wondering if you have any ideas on how to fix it. It’s so frustrating, since I totally agree that the final product should be professional–and it looks so unprofessional on this device.
Hey Guido,
First, this guide is the most valuable resource in all of self-publishing, as far as I’m concerned. I’m very much looking forward to the book.
Question about entities:
I’d like to use symbols for page breaks, and there are lists of named entities for things like card suits, crosses, arrows, etc. If there is a named entity, will it be universally supported? (At least by e-readers etc.) Or do I need to be cautious with symbols?
Thank you! It’s unbelievable how much you’re giving this community.
For the most part they are uniformly supported, though the Kindle does have some omissions. The easiest way to find out, really is to use the entity and load it up in the Kindle software reader. If it shows up correctly, it will work on virtually all eBook readers from my experience.
Hi Guido,
Can you offer any guidance for those of us who also wish to publish through CreateSpace? They’re requesting a PDF file, but when I run the HTML generated using your tutorial, the font sizes are way too large in the resulting PDF, and this is dramatically increasing the page count.
Any advice?
There is a huge difference between an eBook formatting and a print layout. While you can use an eBook formatted book as a source for print layouts, the idea to just use the original HTML file and auto-generate a proper print layout from it, is every bit as bad as trying to take a word processor and export an eBook from it. They are two very different beasts that require very different approaches.
Hey Guido,
Dare I bother you again? (I do!)
Everything has been flawless until I tried uploading my EPUB to iTunes. I get multiples of the following error from an EPUB validator, marked as being on “line” 11 (in multiple “positions”). I wonder if it means anything to you:
element “spanU0003Dcentered” not allowed anywhere; expected the element end-tag, text or element “a”, “abbr”, “acronym”, “applet”, “b”, “bdo”, “big”, “br”, “cite”, “code”, “del”, “dfn”, “em”, “i”, “iframe”, “img”, “ins”, “kbd”, “map”, “noscript”, “ns:svg”, “object”, “q”, “samp”, “script”, “small”, “span”, “strong”, “sub”, “sup”, “tt” or “var” (with xmlns:ns=”http://www.w3.org/2000/svg”)
Thank you so much,
Ronny K
You have an error in your HTML tagging, evidently, but without seeing the actual code I am not able to tell you exactly what happened. Somewhere you have a span that’s supposed to be centered but is mangled with some weird character in the tagging.
Hi Guido! Adding my thanks for this to everyone else’s! My beautifully rendered ePub file, which I made using your guidelines, has passed all three major validators uploads to B&N. Unfortunately, Smashwords direct ePub uploader won’t accept it. I get this error: “The book file you uploaded is in a format we do not support, or it has a filename extension we do not recognize. Your file appears to be a “application/x-zip-compressed” file, and has a “.epub” filename extension.”
Their support tech is telling me to unzip it, which I am struggling to do. Are you familiar with this issue at all? I know how you feel about Smashwords, and I agree. However, to list for free I need to distribute through them.
Also, have you finished your ebook on this subject yet? Can’t wait to buy it!
I wouldn’t upload an ePub file to Smashwords to begin with, because it still has to comply with all their ridiculous “style guide” rules, while severely limiting your exposure because they do not create all the other distribution formats from ePub files. Therefore I would submit a properly formatted Word document and go with that.
Thanks, Guido! I wanted to post an update in case anyone else encounters this. Turns out, all I had to do was switch my web browser (from internet explorer to google chrome) in order for the upload to go through. Go figure.
Hi!
Thank you so much for such a thorough tutorial.
I do have one question, and I apologize if it’s been asked and answered in comments already, and I missed it. I have a preferred font I’d like my book to display in, but I want to also allow readers to be able to override that if they want to. Is there any way to give a font “hint” to ereaders, so that it will default to my house font unless the reader changes the font setting?
Thanks!
Yes, eBooks support general HTML font hinting, but keep in mind that most eReaders do not have much to offer in terms of alternate fonts.
Hi Guido, it’s wonderful how you give the complete workflow step by step here. This will be such an excellent resource to use as I submit ebook files over the next 18 months.
I really hope I can learn this workflow process of formatting my books. I hope I can do it! I seem to get worse with computers as time goes on, not better.
You didn’t mention about ‘chapter breaks’, or how to include clickable links at the front & back, i.e. to give my website link for a ‘new release mailing list’ for readers to sign, or for reviews, etc.
Thanks,
Steve
Guido,
Read through this series and loved it. Now, I am ready to convert my file from Textmate into an html document, but I don’t know how.
How do I do this? (Did I miss something in the series on this?)
Thank you
-Michael
I just wanted to let everyone know, that I have just published a book called “Zen of eBook Formatting” that is now available. It covers the aspects from this tutorial in a lot more detail and also adds a hole lot of additional info, details and advanced techniques to the mix. Here is a link with a bit more info, including a look at the Table of Contents of the book.
http://guidohenkel.com/2014/05/zen-of-ebook-formatting-is-now-available/
Hi Guido,
I’m formatting my fourth book now with your excellent guidelines, but am suddenly running into a problem with the cover. When I convert with Calibre and load the mobi file onto my Kindle Paperwhite, the cover doesn’t show up in the carousel. It does show up if I click cover or page backwards to it. Any ideas? I’m using Calibre 1.48, the latest I can use with OS 10.6 and my covers are the same size they’ve always been.
Thanks, Joanne
This seems to be a bug in the Kindle Software viewer. Occasionally it does not display the covers for books that have been manually loaded into the reader.
Thanks. Sounds like there’s nothing to be done, then. I can only hope that when they’re downloaded properly from Amazon, they’ll display correctly.
Yes, they will be.
Hi again, Guido,
Epub checker is finding all kinds of errors in my Calibre-created ePubs. Mobis all seem fine, and I’m using your template as I have for all my other books. Not sure why it’s suddenly different. Are there any other ePub converters you’d recommend? Sigil maybe? Any other advice? Here’s an example of what I’m getting: text not allowed here; expected element “address”, “blockquote”, “del”, “div”, “dl”, “h1”, “h2”, “h3”, “h4”, “h5”, “h6”, “hr”, “ins”, “noscript”, “ns:svg”, “ol”, “p”, “pre”, “script”, “table” or “ul” (with xmlns:ns=”http://www.w3.org/2000/svg”)
Thanks,
Joanne
P.S. Among other things, it didn’t give me a TOC; it said html 39, html 38, html 37 etc. in the Nook preview.
It seems you’re doing something wrong. The errors in your ePUB that you are mentioning are not a result of Calibre. They are a result of your source code, I am 99.9% sure of that.
Something you’re doing there just doesn’t seem to be right, but without taking as look at the actual source file it is impossible for me to say what that might be.
I’m trying to format a blockquote. This is what I set up in my CSS at the top of the document.
p.blockquote
{
margin-left:2em; text-indent:0em;
}
But as I say, it’s also not identifying my ToC correctly. I have my chapters like this (which I’ve always done). I just noticed I don’t have a chapter definition in my CSS though. I’ve got this int he document: ONE What should I have on top? (And why is it coming out right in mobi?)
OY! I thought I knew what I was doing.
Oh, it didn’t show up properly. I mean h1 class equals quote chapter end quote end h1.
As I said, it is impossible to diagnose the problem from afar. Feel free to email me your HTML file and I’ll take a quick look.
You are the best. I just sent it.
Hi again, Guido. Don’t know if you’ve had a chance to look at my html, but I seem to have fixed the chapter and blockquote problems! I now only have two errors, but I don’t know where to look for them in the html. When I go to the line/position it suggests, there’s nothing there corresponding (also not sure how’d I’d fix them.)
ERROR Justice Index Nook 9.12.14_split_043.html 11 40 element “p” not allowed here; expected the element end-tag, text or element “a”, “abbr”, “acronym”, “applet”, “b”, “bdo”, “big”, “br”, “cite”, “code”, “del”, “dfn”, “em”, “i”, “iframe”, “img”, “ins”, “kbd”, “map”, “noscript”, “ns:svg”, “object”, “q”, “samp”, “script”, “small”, “span”, “strong”, “sub”, “sup”, “tt” or “var” (with xmlns:ns=”http://www.w3.org/2000/svg”)
ERROR Justice Index Nook 9.12.14_split_043.html 13 193 element “div” not allowed here; expected the element end-tag, text or element “a”, “abbr”, “acronym”, “applet”, “b”, “bdo”, “big”, “br”, “cite”, “code”, “del”, “dfn”, “em”, “i”, “iframe”, “img”, “ins”, “kbd”, “map”, “noscript”, “ns:svg”, “object”, “q”, “samp”, “script”, “small”, “span”, “strong”, “sub”, “sup”, “tt” or “var” (with xmlns:ns=”http://www.w3.org/2000/svg”)
Any ideas, either looking here or at the html I sent? Thanks so much!
Never mind!
Yes, I looked over the file, made the necessary corrections and sent it back to you just a moment ago.
A good series of articles well worth reading for those who need a quick guide to HTML. Time has marched on however, and Calibre has been updated to include an editor which is simply brilliant. Not only that but it will now make a reasonable job of converting MS Word doc and docx files to epub format. This saves a huge amount of time messing about with text editors, especially if you’ve included different styles, images and effects such as lists, tables, links, footnotes, subscript and superscript
One thing I agree about is that MS Word makes a dreadful mess of HTML, so it’s still worth going through Guido’s guide to get an understanding of what’s needed.
My technique is:
1. Write the book in MS Word and use styles to get the appearance you want.
2. Save the document as a docx file
3. Import the docx file into Calibre
4. Convert the file to epub format and add meta data and table of contents
5. Right click and go into the Calibre editor
6. Use the tools to remove unused MS Word styles, embed any unusual fonts you’ve used and tidy up Word HTML
7. Check the html and use what you’ve learnt from Guido to fix things like bulleted lists (MS Word makes a real mess of those)
8. Tweak the CSS file – e.g. to insert graphics for text separators
9. Save and validate the file.
10 That epub file can then be sent to Amazon AND Smashwords
Good afternoon, Guido. Like everyone else who has commented, I have found this series extremely helpful and I greatly appreciate the amount of time and thought you put into it.
I’ve gone through and formatted my file and I thought everything was fine.
I used Jedit to do all of the HTML coding. I then used Calibre to do the conversions. When I checked through the Epub version, I noticed there were square symbols (black ones with question marks in the center) in the places my quotes, single quotes and dashes should be. I went ahead and did a conversion into MOBI as well to see if maybe it was just the Epub version, but it did it as well. Then, for comparison’s sake, I went ahead and did an RTF version. The black squares with the question marks became clear square symbols in the RTF. I’m very green at creating anything with HTML and I have no clue what caused this. I’m pretty sure I did something wrong, but I’m not sure what. Do you know what would cause these squares to appear instead of the quotes, single quotes and dashes?
Thank you for any thoughts you have on this.
A.J.
It would appear you did not convert the special characters to named entities.
I think you are right–no, I know you’re right. I just reread through the blog posts. Can you give me an example of how to write the code for the special characters? For example, you mention the ellipses and you give the entity: … Where would I put that code? At every ellipses or at the beginning or middle or end of the style sheet?
Thank you, again, sir, for your help.
Hi Guido,
I’m publishing my first book and I have to say that I have been following your guide religiously. I cannot thank you enough. I’m at the end of the process now. I just have to view it and I have a question, when you state this-
“For first checks I always use the software versions of the Kindle or the Nook reader or Adobe Digital Editions.”
Is it the kindle app you use or some other software? Because I can’t seem to upload my files to the kindle app for first checks. And if it is the kindle app how do I do that? I really can’t seem to figure that out.
Okay I figured out why why I couldn’t upload my files. I was using epub for the kindle app. When I coverted the book to mobi it was fine. The only thing is the table of contents is at the end of the book. How do I move it to the front right after the cover?
Never mind. I figured it out.
First, I just wanted to say THANK YOU for the awesome guide! It really is excellent!
Secondly – I have a question about front material. Do you have some template code you can share with us? I’m having trouble getting the page breaks and centering to work on things like the title page, dedication page and copyright page. Thanks!
You have made an absolutely major contribution in helping so many (myself included!) with eBook formatting. And then too to interact with so many seeking help: we are all indebted to you, THANKS!!
I have for days been trying to work out what I am doing wrong, basically in browsers, eg this message and in many readers I have tried (including Calibre, Kindle Previewer & Adobe Digital my ePub file) most html marking is still there/shows and I don’t know why.
Could you/someone please try to tell me what I am going wrong!
I can send the whole file, but this may be enough:
My TextMate HTML file start, (essentially “drawn” from your articles) reads:
html, body, div, h1, h2, h3, h4, h5, h6, ul, ol, dl, li, dt, dd,
p, pre, table, th, td, tr { margin: 0; padding: 0em; }
p
{
text-indent: 1.5em;
margin-bottom: 0.2em;
font-size: 1.5em;
line height: 2.25em;
}
p.nonindent
{
text-indent: 0em;
margin-bottom: 0.2em;
font-size: 1.5em;
line height: 2.25em;
}
p.chapter
{
page-break-before: always;
text-indent: 1.5em;
margin-top: 5em;
margin-bottom: 2em;
font-weight: bold;
font-size: 1.5em;
line height: 2.25em;
}
p.centered
{
text-indent: 0em;
text-align:center;
}
span.centered
{
text-indent: 0em;
text-align:center;
}
BUT
Viewed in a browser (as here) or in readers the text displays with much of the HTML markings (!!) as follows:
CHAPTER ONE
text-indent: 0em;Birth and death: singular, separating, solitary events recalled only by others and placed around otherwise imperfectly remembered life.
Greg first learnt something of the circumstances of his impending birth through his older cousin Ellen’s recounting of events years later:
‘Greg, I remember it so well, just as if it was yesterday.’ Ellen spoke chuckling (principally to herself) during a shared luncheon.
‘I was just a child then. Aunt Emily, your mom, was having dinner with Aunt Nan and my family in the big family dining room at Donegal Avenue.’
Greg had never known or seen the house at Donegal Avenue, but had heard of it often enough in different family contexts over the years. Greg had already created his own sense of that home. It would have been a grand precursor to birth – large, imposing, with dark furniture and oil paintings; moneyed and aloof.
‘Suddenly, your mom stopped eating: ‘The baby’s coming’.
There was a flurry of excitement and expectancy around our dinner table, all precipitating a halt to the evening’s dinner.’
Moments otherwise lost; now however forever caught for Greg, witnessed and passed on from past and for future safekeeping; Greg becoming a belated interested observer and participant in life before birth. Ellen linking Greg’s present to his past and at the same time reminding Greg that, although born alone (as we all are) and bred as an only child, he remained part of a large disparate family with aunts, uncles and cousins transcending and peopling generations. Greg’s family recollections interlocked with Ellen’s continuing chatter.
‘If I remember correctly Greg, it was Auntie Nan, not your dad . . . he was probably away at the farm . . . ‘ (The farm would have been several hundred miles away) ‘. . . Nor my dad . . .’ (Greg’s Uncle Albert) ‘. . . nor mom; yes it was Nan who then gathered up your mom to take her, an you, to the nursing home.’
Greg envisaged it all. Mother with impending child briskly, efficiently whisked away by efficient Aunt Nan, a nurse and midwife, to the nursing home, the Queen Victoria Maternity Hospital, Johannesburg, then a welcoming shelter, now defunct. A referenced starting point for Greg whose mother, aunts and father had all separately pointed out on numerous separate and various occasions, saying words to the effect of:
‘That’s where you were born!’
Thank you! Tim
Apologies but above the portion of My TextMate HTML file start already sent to you:
“html, body, div, h1, h2, h3, h4, h5, h6, ul, ol, dl, li, dt, dd,
p, pre, table, th, td, tr { margin: 0; padding: 0em; }” etc
I have:
Thanks again Tim
I am not sure I understand the problem you are describing. Feel free to email me the HTML file and I’ll be happy to take a look.
After all these years, Guido is still my go-to resource for ebook formatting. If he’s helped you, and I can see by all the comments that he’s still giving himself away for free… then spend a few bucks in return and buy his new ebook the zen of ebook formatting. I just did! http://www.amazon.ca/Zen-eBook-Formatting-Guido-Henkel-ebook/dp/B00KJAH4HS/ref=sr_1_2?s=digital-text&ie=UTF8&qid=1417731356&sr=1-2&keywords=guido+henkel
Dear Guido,
I wanted to tell you that I found the problem that turned my em dashes into three short dashes – it was a Calibre setting after all! Namely “unsmarten punctuation” in “Look and Feel” – no idea how I missed that before. Sorry!! Don’t I feel silly now…
But I have another question: As far as I can tell from the Calibre html view of the epub in “Edit book”, Calibre converts all of my painstakingly inserted entities (for ellipses, curly quotes, em dashes, …) right back to the typographical versions.
Is there a way to prevent this – and if not, what is the benefit of going through the entire entity-replacing rigmarole?
Thank you again!!
Glad you found the problem, Sylvia, but no, Calibre should not be doing this either. It may be, however, that the “Edit book” function does that. What do you need “Edit book” for anyway?
I was merely checking to see what the converted ebook looks like – though I see now there’s no need to go through the “Edit book” option. I didn’t actually change anything in “Edit book”, however, only look at the file…
Is there a way to look at the html ion the coverted epub another way, so I can check whether the entities are still there before I open the file with “Edit book”?
Checked in Sigil – and yes, the entities in my converted epub are really gone. 🙁
I found something here that seems to be the answer:
http://sourcecodebrowser.com/calibre/0.6.54plus-pdfsg/namespacecalibre_1_1utils_1_1genshi_1_1util.html
I quote: If the `keepxmlentities` parameter is provided and is a truth value, the core XML entities (&, ', >, < and ") are left intact.
That’s what I want! But how do I set this parameter?
The ePub file is actually a ZIP file. You can unpack it with an Unzipper and you will see all the individual files that make up the book, including the HTML files, which you can then load up in a text editor.
Calibre should not, by default, replace these entities. Once again, it would appear as if you have some setting selected that should not be active.
Guido,
These blog posts and your book are both very helpful, and I think you deserve the chorus of thanks that you’ve had.
I would like to know, however, why you do not recommend svg files for images. I’ve spent a fair amount of time converting svg to jpg, only to find several sources recommending svg. Svg files are certainly smaller, they are much sharper than png or jpg, and as you no doubt know the epub standard requires svg compatibility since 2006. Svg images work well on my Kindle Fire and Kobo Touch, my son says his iPad handles them, and I find there are people who recommend an svg wrapper for jpg and png.
Using an svg image allows one to put a caption in the image, which gets rid of the orphaned caption problem which you mention in the book (at the price of a different font, yes, but we can’t have everything, it seems).
I’m sure you have your reasons, but what devices do not handle them?
The reason is very simple really. SVG is a vector format, which is fine when you’re dealing with things such as clipart, etc., but it is simply not really valuable or suitable for photographs, because these are by their very nature bitmapped images. Converting them to SVG only wraps the bitmap into a data block that is then displayed by the renderer as a bitmap, so there is absolutely no benefit to it.
Thanks for the reply. So svg doesn’t actually break anything?
I’ve used Inkscape to do diagrams, illustrations, and tables, so the files are already svg. They can be converted to jpg, of course, but it makes them blurry on large (computer) screens , particularly text, no doubt because of going to 100% of screen width and hence blowing them up. The svg comes out very crisp and clear, and at the size of the image, not blown up. I could try using max-width; presumably the smaller and older devices will just disregard it if they don’t understand it, but what happens with a 2560×1600 4G Kindle or other? My image could look like a postage stamp on a letter. Perhaps that will happen with svg also?
I can do the tables as tables in html, of course, but the results so far aren’t quite what I would have liked, and I notice you warn against tables. Maybe the best answer is to accept the blurring.
Another small problem: the Kindle Fire doesn’t seem to like ordered lists. Up to 9 all goes well, but once in double figures the tens digit disappears. I’ve tried messing about with margins, padding, and indent, it just disregards them. It’s not a show-stopper, I can avoid ols over 9 elements in my current masterpiece.
Guido… I’ve just gone through your tutorials twice, the first time to get the gist, the second time to try it myself. I actually finished a manuscript in both MOBI and EPUB. We’re they without mistakes? No… but I didn’t expect that. I wanted to see if it were possible to do “this thing” with the limited computer experience I have, and believe me, it’s limited.
My wife now has that manuscript on her iphone and her ipad, and she is giddy with delight. Of anyone, she understands the amount of effort I put into this my sixth novel. The two of us sat on the couch last night and ogled as we paged through, sometimes re-reading paragraphs to one another. It was fun.
So I wanted to thank you for your generosity in providing these tutorials. It’s a good man who shares the spoils of his victories found in hard won battles. But I felt a thank you wasn’t enough, so I’m going to purchase your book, hoping that’s says “thanks” better than a comment on your site.
I work on a PC, not a MAC, and I suspect there will be some issues as your book is written for MAC users. But maybe I’ll be able to figure out those issues, I’m hoping I can, because I want to be able to do this. Of course, if that doesn’t happen you’ll probably be getting a call from me asking you to take these projects over. I’m willing to try just about anything, but I know when to quit.
Wishing you all the best,
Ski
Author: A Life in Dreams
Thank you so much for your kind words and your support. I am not sure, however, where the impression comes from that my book is written for Mac users. Just like the tutorial it keeps both platforms in mind. It simply explains a process and the process is entirely unrelated to the type of computer you are using.
Guido, I read your whole book – and you’re right. PC users should not be reluctant to buy it. It makes no difference. By the way. Last night we designed a new book cover. Today we’re going to make the change and then have fun showing it off. Once again, thanks.
Best Rgds………..Ski
Hello. I’ve created a TOC for my first book using html. I put a link for each chapter in their own separate row in a and and don’t want any padding and it works fine when I use CSS. But it seems using tags is frowned upon now so I tried creating my TOC using list method and CSS and couldn’t get the padding to be zero. Same for when I created my TOC using straight tags and CSS where I declare the parent tag to be display:table, then the next tag display:table-row, and the final tag display:table-cell.
The only way I’ve been able to get zero padding is with straight tags and in the CSS say padding:0;
BTW I’m creating this book for Amazon Kindle, and these results are when I display it on the Kindle Previewer.
Have you run into this problem before and if so, how did you solve it? Thanks in advance 🙂
I am not entirely sure I understand the problem you are outlining. What do you mean by using tags is frowned upon? As for using display:table-row settings, etc I would highly advise against that because there are countless eBook devices and software out there that do not support that at all.
Why don’t you let Calibre create the TOC for you? That way you have absolutely no work with it, and it builds and inserts a proper NCX TOC for your as well that is accessible through the device’s built-in menu system, which in my opinion, is much more important than any HTML TOC.
If you haven’t purchased the book yet, make sure to do so now. The new version has been adapted to current developments and expands on various subjects to clarify and to accommodate new developments in eBook devices.
Click here to grab the book on Amazon!
Thank you so much for this invaluable guide! I have just bought the revised edition of Zen of eBook Formatting and will be buying your other books too as a small ‘thank you’!
Hi Guido, I’ve followed the book formatting instructions to a “t” based on your Zen of eBook Formatting book (which is a godsend by the way), and my ePub file is great. But when I output the mobi file from Calibre, my 600×900 px JPEG front cover shows up as a teeny weeny icon in my kindle preview software and also on my iPad. The ePub cover is perfect though (at least in iBooks). When I look at your Zen of EBook formatting cover on my iPad, it looks perfect, nice and big. Do you have any ideas what could be wrong with the mobi output for my cover? Many thanks!
Oh, and following up with my previous question, I notice that there is no cover icon showing in my Kindle library on my iPad or on Kindle Viewer. just wondering if there is an output setting that I missed for mobi.
That is a glitch in the Kindle software, happening oftentimes when you side-load books. It won’t be a problem once you upload the book to Amazon and it is being delivered through their system.
Thank you Guido! Thank you for everything. You’ve made the process so easy to follow. It’s empowering to be able to do it myself. Sending you massive gratitude.
Hi Guido;
I’ve completed the conversion of my mobi and epub files and they look great on Kindle preview, iPad, and in iBooks. When I upload my epub to iBooks through iTunes Connect. I then validated the file through epub validator, this error came up:
Error while parsing file ‘attribute “U0002E” not allowed here; expected attribute “accesskey”, “charset”, “class”, “coords”, “dir”, “hreflang”, “id”, “lang”, “rel”, “rev”, “shape”, “style”, “tabindex”, “target”, “title”, “type” or “xml:lang”‘.
Do you have any idea how to fix this? I’ve looked through the last chapter in your Zen of ebook Formatting book and can’t seem to wrap my mind around the XPath techie stuff is that would help. I’d love your thoughts on this.
WOW! I’m definitely going to be going through this course as I start trying to build my own library of books. I’ve a few short stories that I wrote, and want to put out there for people to download.
Even better, I never knew that HTML could be used as a source file, or that it would be so easy to implement. I’m just going to have to remember that issue with correctly centering certain elements…
THANK YOU!!!
Thank you so much for all of this great information! This must have taken a long time to put together. Thank you so much for making this available.
There is one thing I didn’t notice though that either you and others have started doing on purpose or it’s something you all aren’t aware of. If you look at any professionally published book they NEVER indent the first line in the first paragraph of a chapter or a new section. Why did you and do so many self published authors do this?
That is a matter of personal preference, and to keep things simple, I did not include this in the tutorial. Since it is common practice – and I am doing it myself in my books – the technique to achieve this is included in my book “Zen of eBook Formatting,” however.
Hello Guido
Thank you for putting together this fantastic guide. I was a little bit worried about the whole HTML formatting thing, but with your help, I managed to get to grips with it very easily. I’ve just finished formatting my first novel, and it is looking quite awesome.
I only have one small issue, and I have a feeling it has something to do with either the Calibre formatting, or the way that the Kindle deals with the MOBI file. I’ve downloaded the file to my Kindle for checking, and everything looks fine, except that sometimes a line of text is not justified at the right hand side correctly. I’ve changed the font sizes, and it seems to be the same sentences each time that aren’t being wrapped correctly. They get split over the lines in different places, but there is always an indent at the right each time.
I was wondering if you’d heard of this issue before, and if there is anything I can do about it. I was wondering if it was because I’ve loaded it straight to my Kindle, rather than getting it there through Amazon.
Matt
That is a bug in the Kindle firmware that they have never addressed in the ten years that the Kindle has been out. Even when using the KF8 eBook format, it still happens on occasion, though admittedly, it has gotten better. So, sorry to say, there is nothing you can do about it. At least not that I know.
Guido
Thanks for that. I’ll see how it looks when I upload it through Amazon. My Kindle is fairly old, so that may not be helping.
Hi, Guido. Thanks so much for this wonderful guide. I’ve followed along with you, added my own touches, and I’m pretty close to a fabulous epub. However, while checking my manuscript, I found a problem; At one point in the story, a character is quoting a line from a poem. I need a left double-quote followed directly by a left single quote. The codes were replaced appropriately, as far as I can tell. However, the output is as follows:
“&lsquo
Oddly, on the right hand side of the quote, both single and double quotes output correctly. Do you happen to know how I might resolve this issue?
Thanks so much. This is an excellent guide and I will recommend it to friends. 🙂
Make sure you add the semicolon after the &lsquo so that it looks like this ‘
Thanks so much! That was it. I can’t believe I missed that semi-colon.
One more question: I am now trying to format for Smashwords (non-epub formats). I need to use Smashwords because I am trying to get my book listed with B&N as permafree, and as I understand it, Smashwords is the only way to do so. So, of course, I have to use a Word document for the other formats. I’m trying to create upcaps at the beginning of chapters, and I resorted to using character style sheets to do so. When I uploaded and previewed the file through the online viewer, the first paragraph is displayed in a different font, even though I never specified a font and the same paragraph styling is still applied. I tried going back, removing the character styling, and replacing with manual bold and increased font. Still the same thing.
I started reading your first Jason Dark book today (very cool so far, by the way), and I noticed that it had the same issue. I’m reading on Kindle. Anyway, I was wondering if you knew anything about this issue. Is there simply no known fix? Would you say that the different font is worth the trade-off?
Thanks again! 🙂
First, let me start by saying that the online viewer on Amazon’s website if completely broken. Has been for years. Amazon has been aware of it for years, and, for some reason, they are not addressing the problem.
As for the font switch in my books, I deliberately use a different font for the first line in my chapters. That is hard-coded in the books and no accident. Depending on the Kindle model you have, the appearance may or may not be what I had in mind, but as I said, I did this deliberately.
I am not sure what is going on with your books, but if it’s only occurring in the online viewer I wouldn’t worry about it. If it is happening on the actual device, something seems to be wrong with your code.
Thanks so much for creating this guide!
I’m getting ready to self-publish and had NO IDEA where to start, and probably would have ended up with some awful formatting issues, but I spent quite some time patiently following your guide, (thanks for being so thorough and step-by-step with all your instructions and including pictures an everything) and the end result looks absolutely beautiful.
(Still have a few things to tweak, but now I know what I’m doing, it should be simple)
Thanks again; I couldn’t be more thrilled with how everything turned out.
Dear Sir,
I worked for more than a year for thousands of hours and created an e-book and website about the long-term side effects of harmful drugs. I then tried SmashWords to turn my word file into an e-book. I followed their formatting guide so carefully, yet the output was not professional looking, with extra blank spaces under images, some links not working right no matter what I tried, etc. It was so frustrating until I saw your blog. I am so grateful you published this guide that finally gave my research the error-free professional representation it needed. THANK YOU SO MUCH!
That looks far, far less painful than I had imagined. Struggled a bit with the search for Italics in order to wrap it with the correct tags (the control i didn’t work. Have do drill into the advanced settings, choose “font” then “italic”. (Word Mac 2011). One question though: you say “They are safely embedded directly in the files so that they can’t get lost.” and yet I cannot find the step where they are added to the file. I see where the HTML goes that refers to them, but not where these images live in order to be referenced. (I got your book the Zen of, so perhaps that will solve my questions. Especially as there are a spine and back cover to be put in. But, thanks a ton.
When you are building the ePub or MOBI file, the images you are referencing in your HTML file will be directly embedded in the eBook file. You do not have to add them manually. Calibre is doing this for you, automatically, whenever it encounters an![]() tag in your HTML code.
tag in your HTML code.
I am not sure what you mean by spine and back cover—eBooks do not have a spine and they do not have a back cover either, and the cover itself is not part of the HTML file either. It is part of the meta-data, as explained a little further up in this article.
Hi Guido,
I have been following your excellent instructions for formatting an ebook. Now I am at the stage to use Calibre and I have discovered an issue. My book is divided into five parts, each with chapters starting with “1” and numbered consecutively.
The formatting has tagged the chapters, but they are not all numbered consecutively and will not recognize the various parts. For example, the following is the HTML code:
<span class=”centered”><strong>Part One</strong>
<span class=”centered”><strong>The Summons</strong>
1. The Battle
Do you have a suggestion about how I can best handle this issue?
Thanks very much,
Jeff Johnstone
You should create a style for the part and a separate one for the chapters, like this…
`
<p class=”part”>Part One</p>
<p class=”parttitle”>The Summons</p>
<p class=”chapter”>The Battle</p>
`
Then, in Calibre, in the Table of Contents section, you define dependencies where the level 1 dependency is `//h:p[re:test(@class, “part”, “i”)]` and the level 2 dependency is `//h:p[re:test(@class, “chapter”, “i”)]`. This will structure the parts and chapters, respectively.
As for the numbering itself, If you need numbering—not sure, why—that you have to do manually and just add the chapter number to the chapter title.